Google OAuth setup
Set up Google OAuth by creating a project and client ID in the Developer Console. Enable required APIs and configure your app for Aurinko.
In order to connect Google accounts to Aurinko through OAuth2 authentication you'll need to create your own Google Project and OAuth client ID. You will configure Aurinko to use this client ID. If you have any trouble creating a Google Project and OAuth client ID, get in touch with [email protected] and we'd be happy to help you out!
Create a Google Project
To get started, head over to https://console.developers.google.com/. You will be prompted to log in with a Google account if you're not already logged in with one. If you don't have a Google account, you can create one at https://accounts.google.com/signup/.
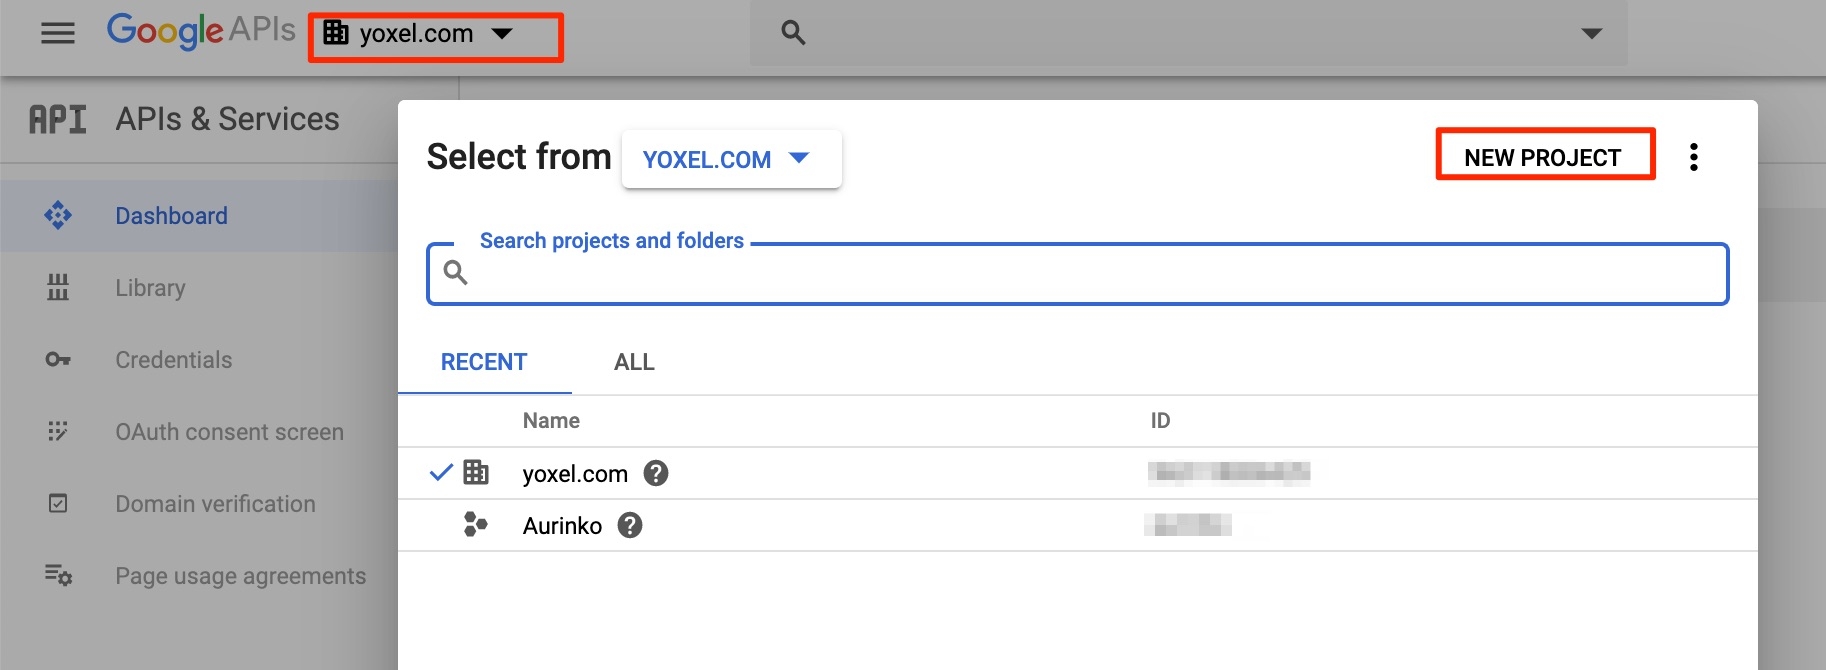
Use the selector at the top (next to the Google logo) and click the 'NEW PROJECT' button in the popup window that opens.
Name your project and click "CREATE".
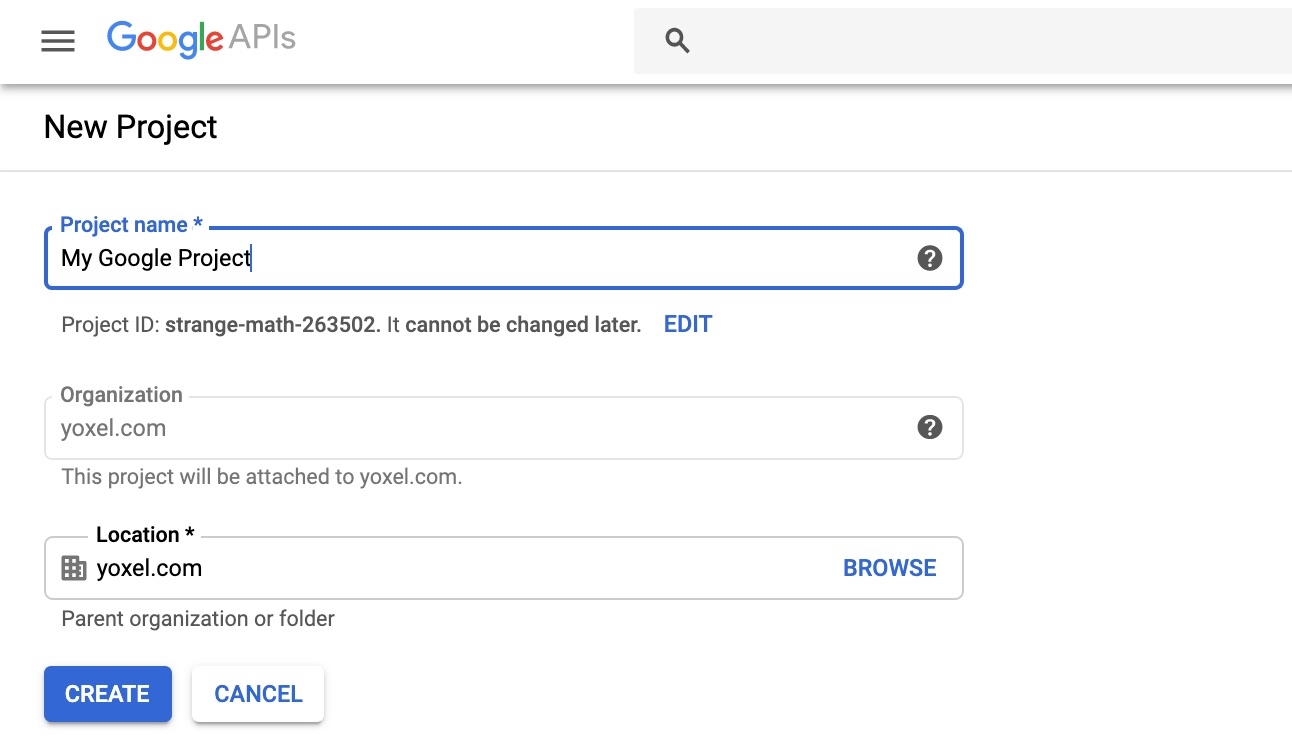
It may take up to a minute or two for Google to finish creating the project.
Enable APIs
Click the "ENABLE APIS AND SERVICES" button.

You'll be presented with the following search box:
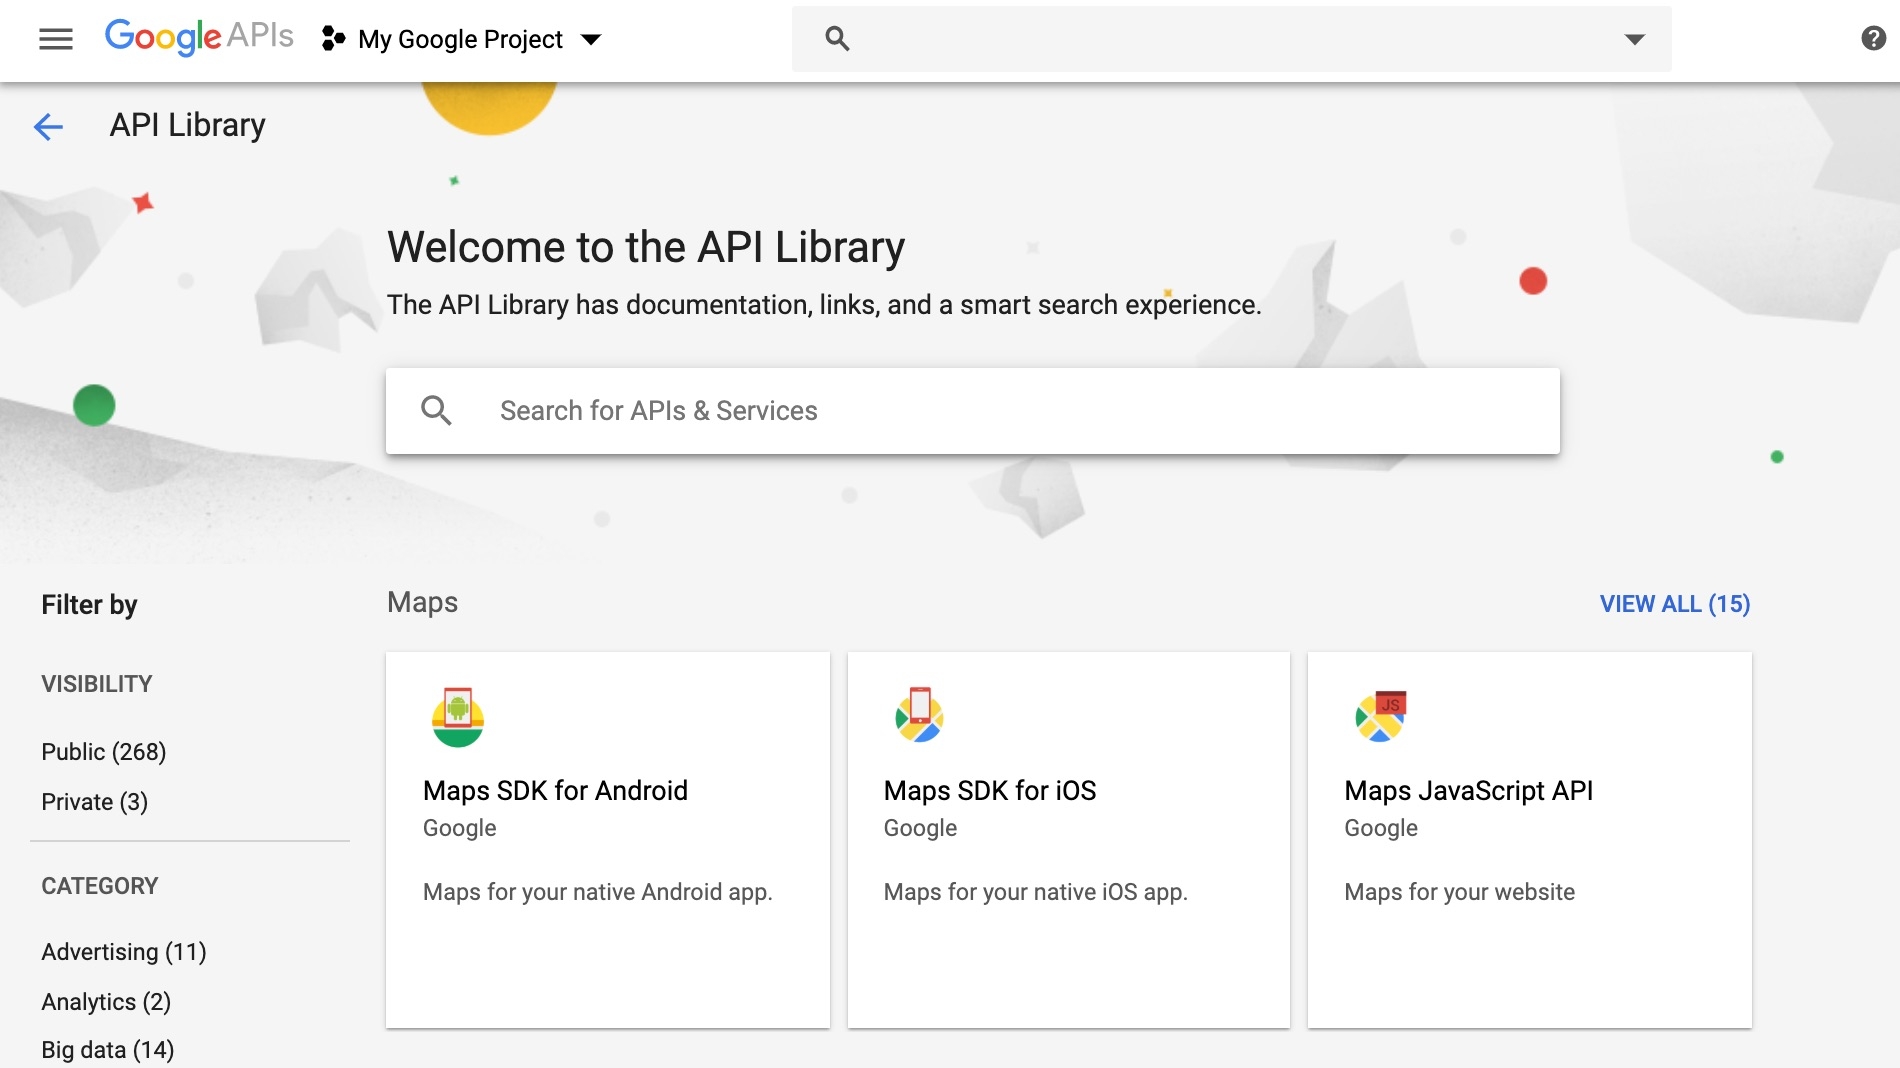
Type "gmail" into the search box and click on the "Gmail API" card once it appears.

Click the large blue "ENABLE" button next to the Gmail logo.
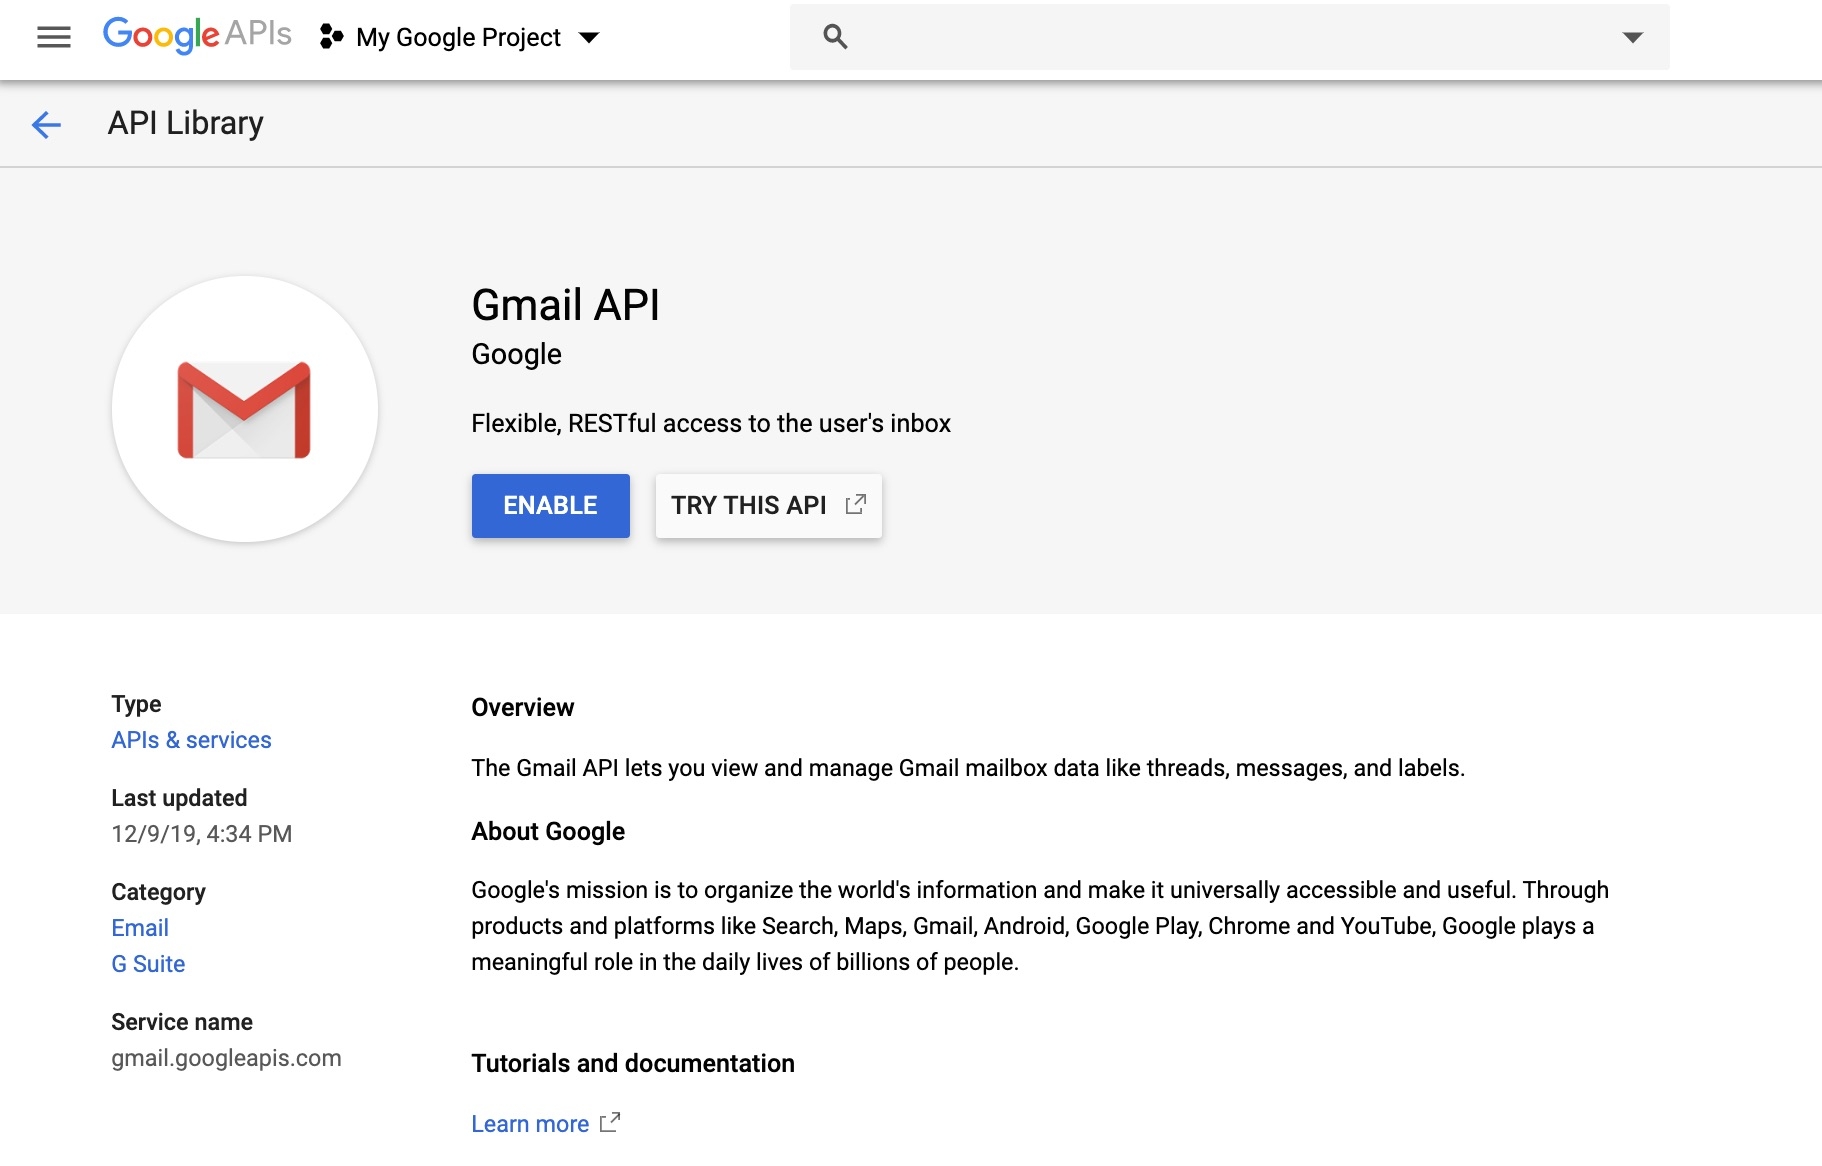
You'll find yourself on the following page. Click the search box in the center of the top bar.
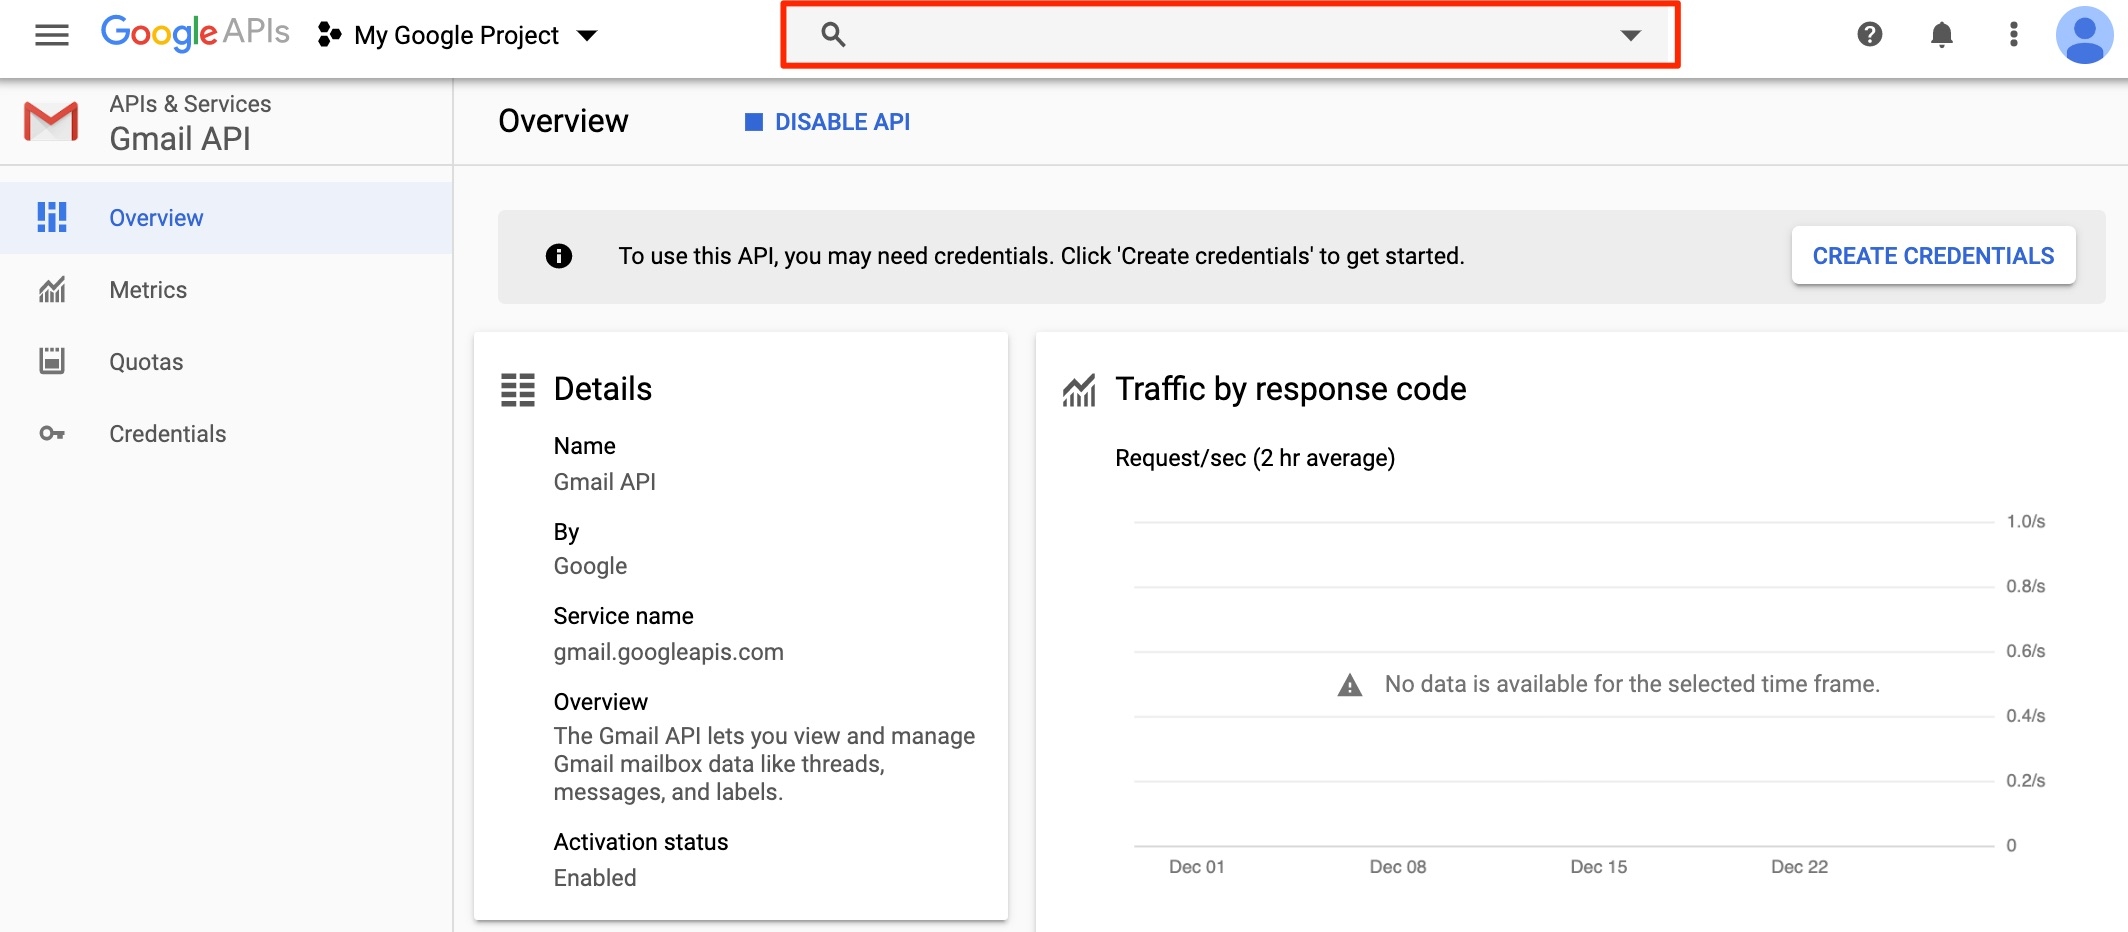
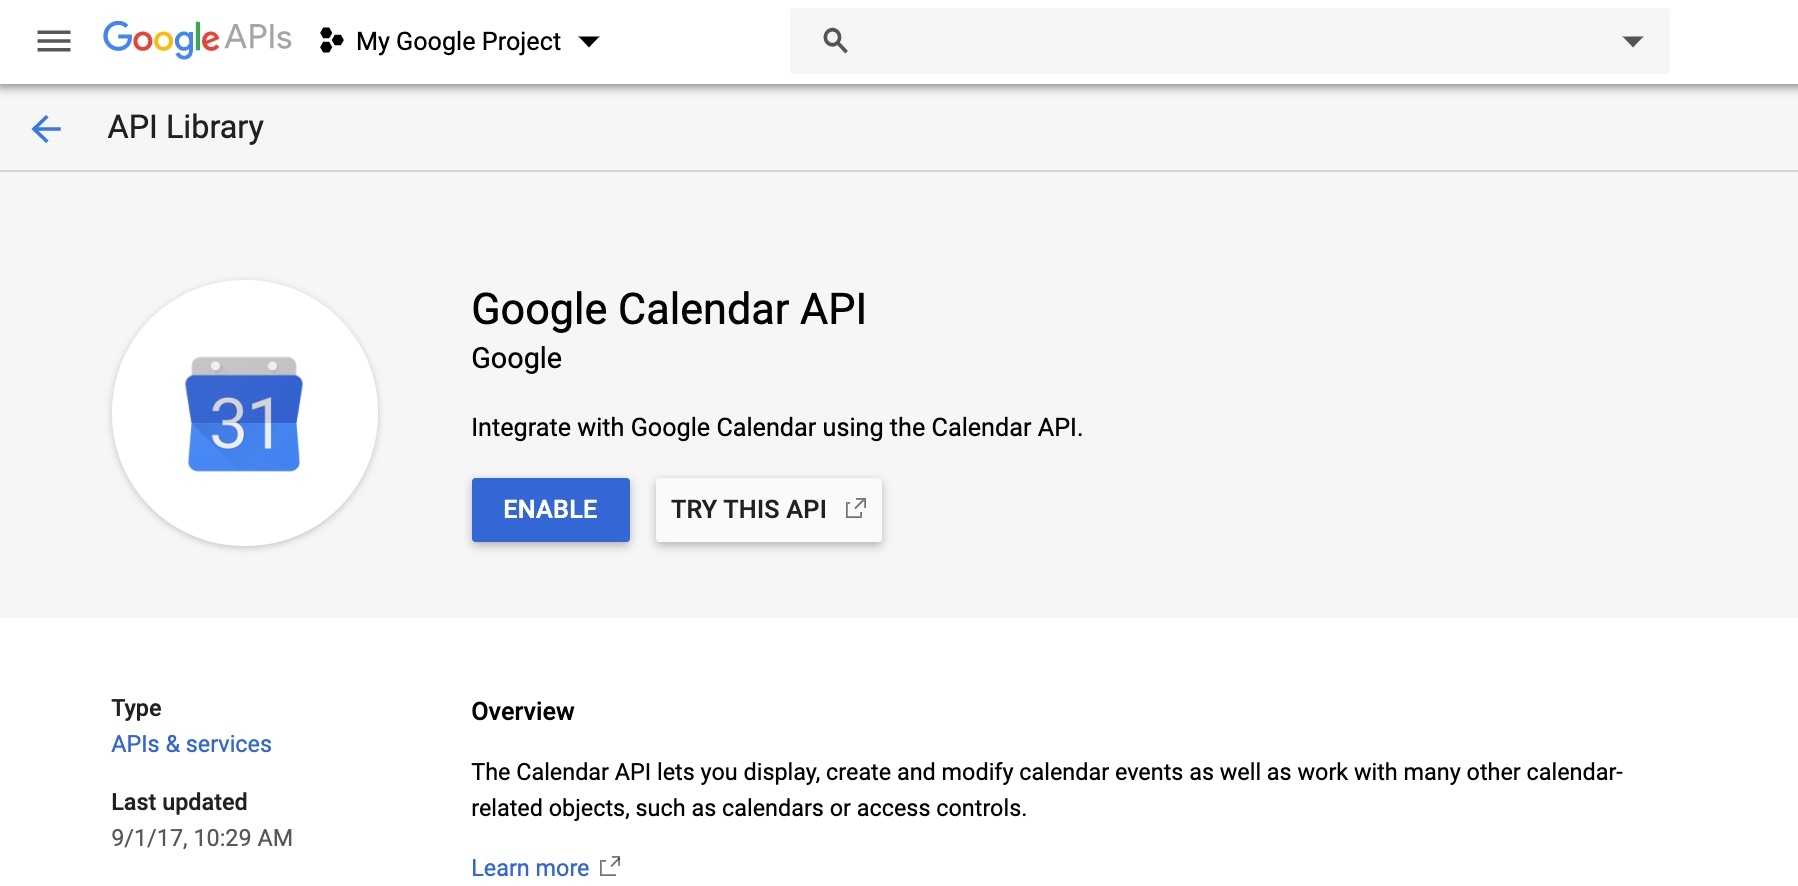
Type "calendar" and click on "Google Calendar API" once it appears.

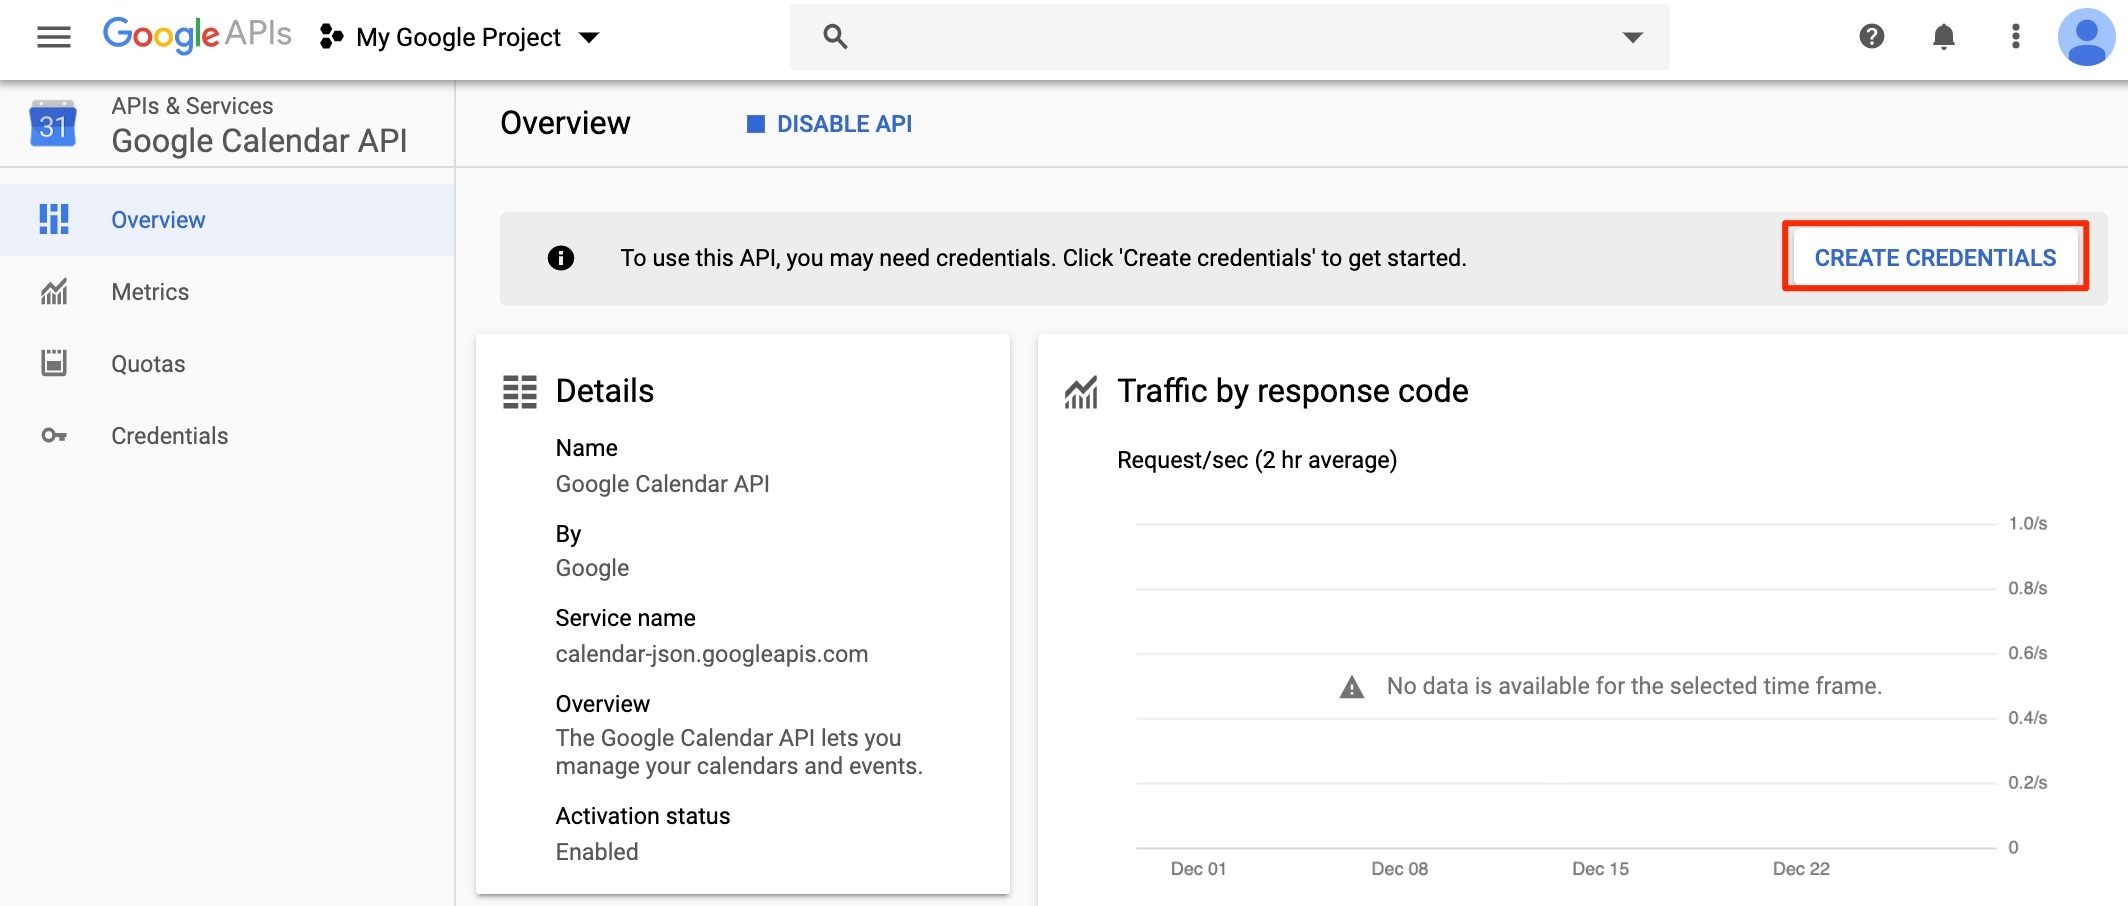
Click "ENABLE" for the Google Calendar API.
In the similar manner find and enable Contacts API, Google People API, and Tasks API.
Configure OAuth consent screen
The last step to do in the Google Developer Console is to create a credential for OAuth, starting with configuring the consent screen. Click the "CREATE CREDENTIALS" button.
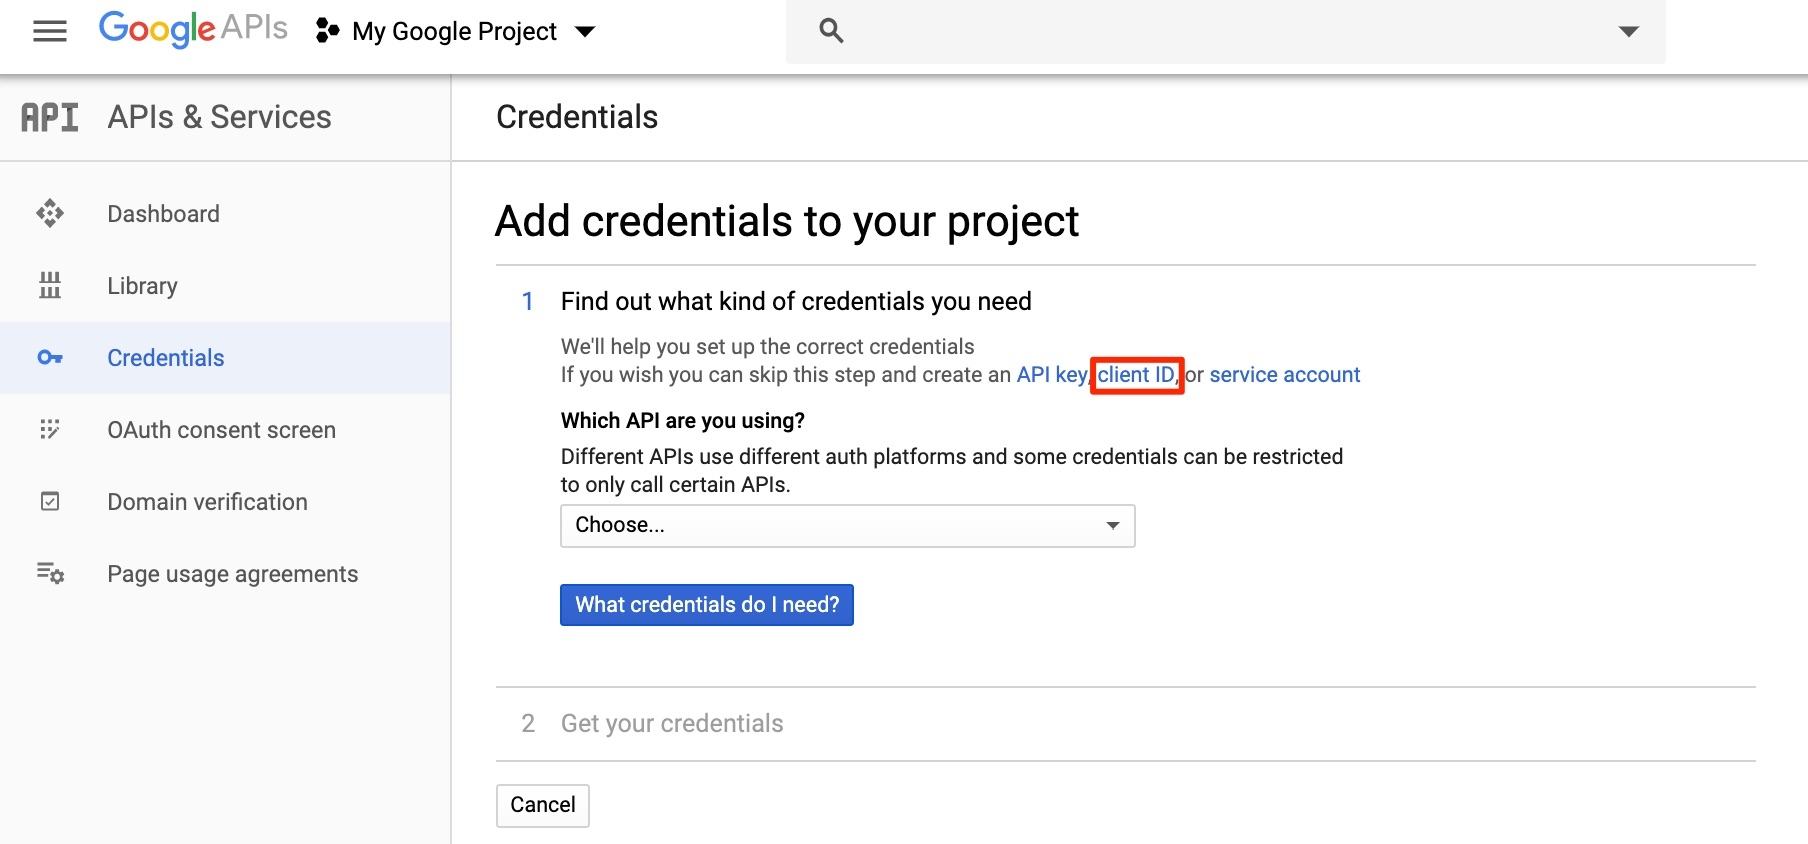
On the next screen, click "client ID".
Then click "Configure consent screen".

Choose "Internal" or "External" user type. An "Internal" user type Google application will only allow access to users from your organization ( @your-organization.com). This type of application allows you to entirely skip the App Verification and Security Review processes required by Google for public-access applications, but limits which accounts can authenticate to your application.
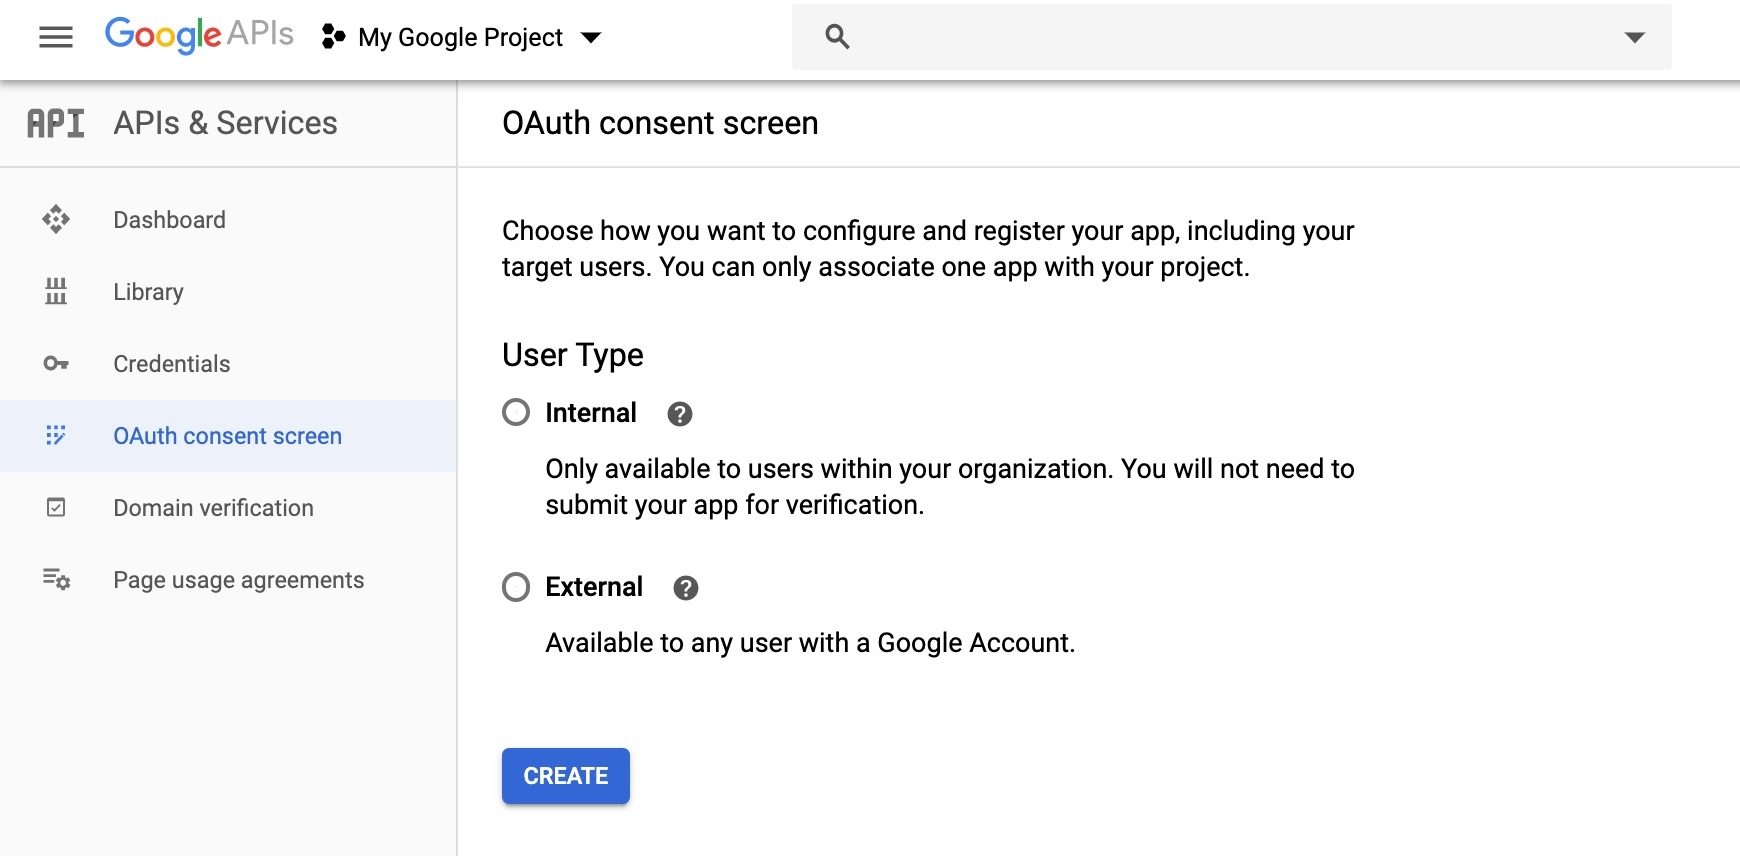
On the following page, fill out the "Application name" field.
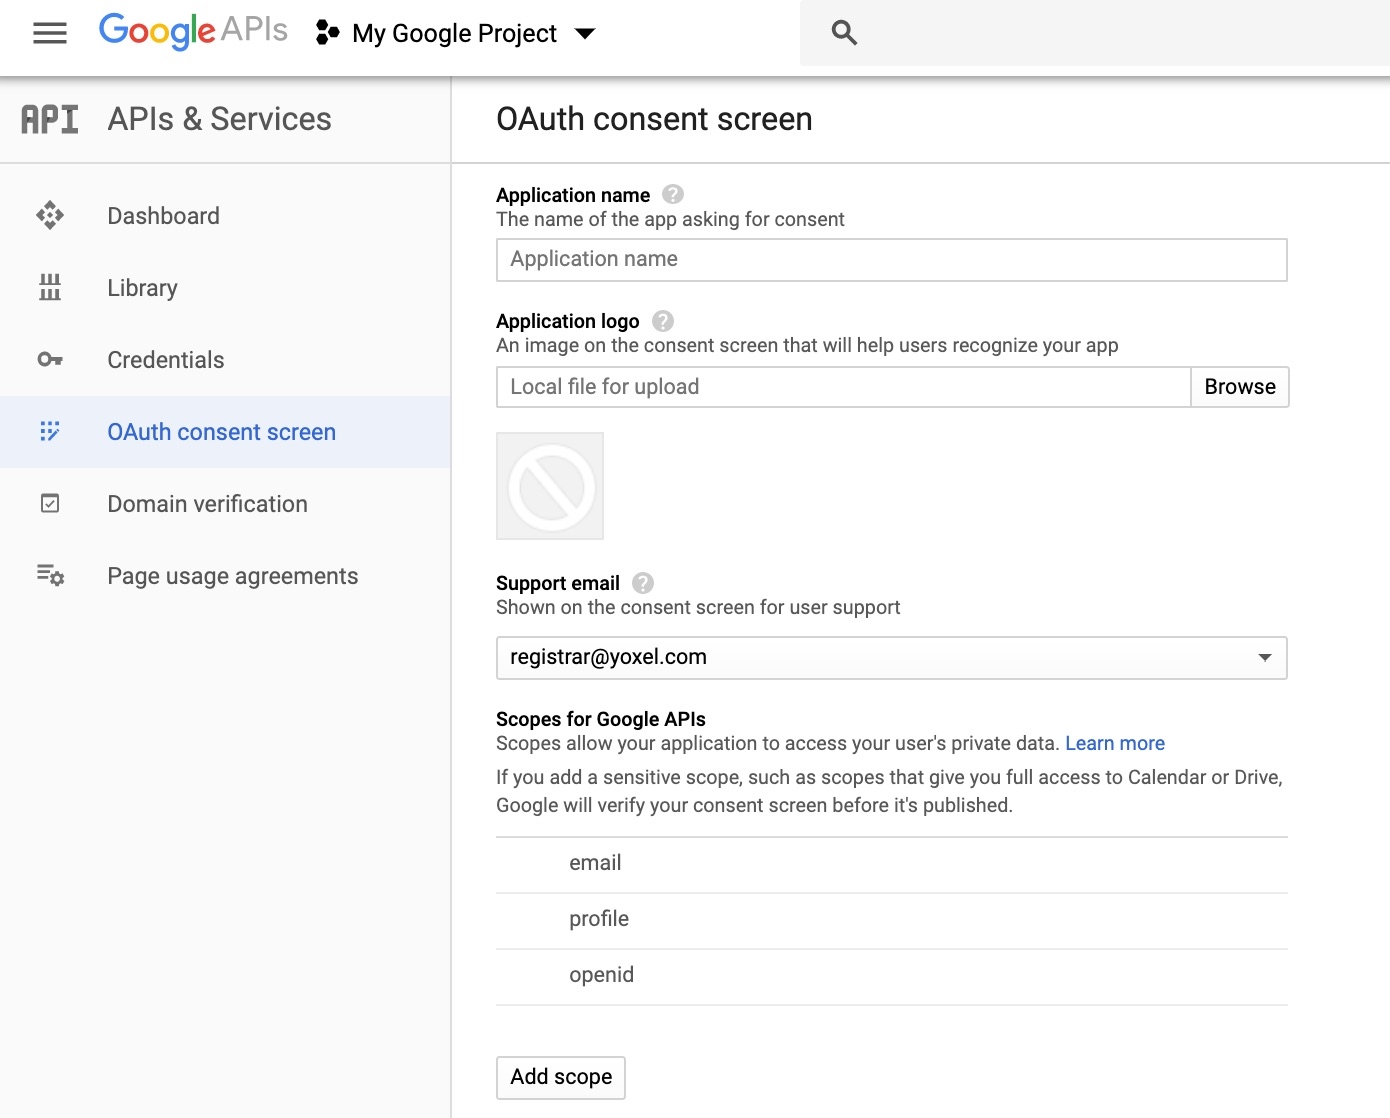
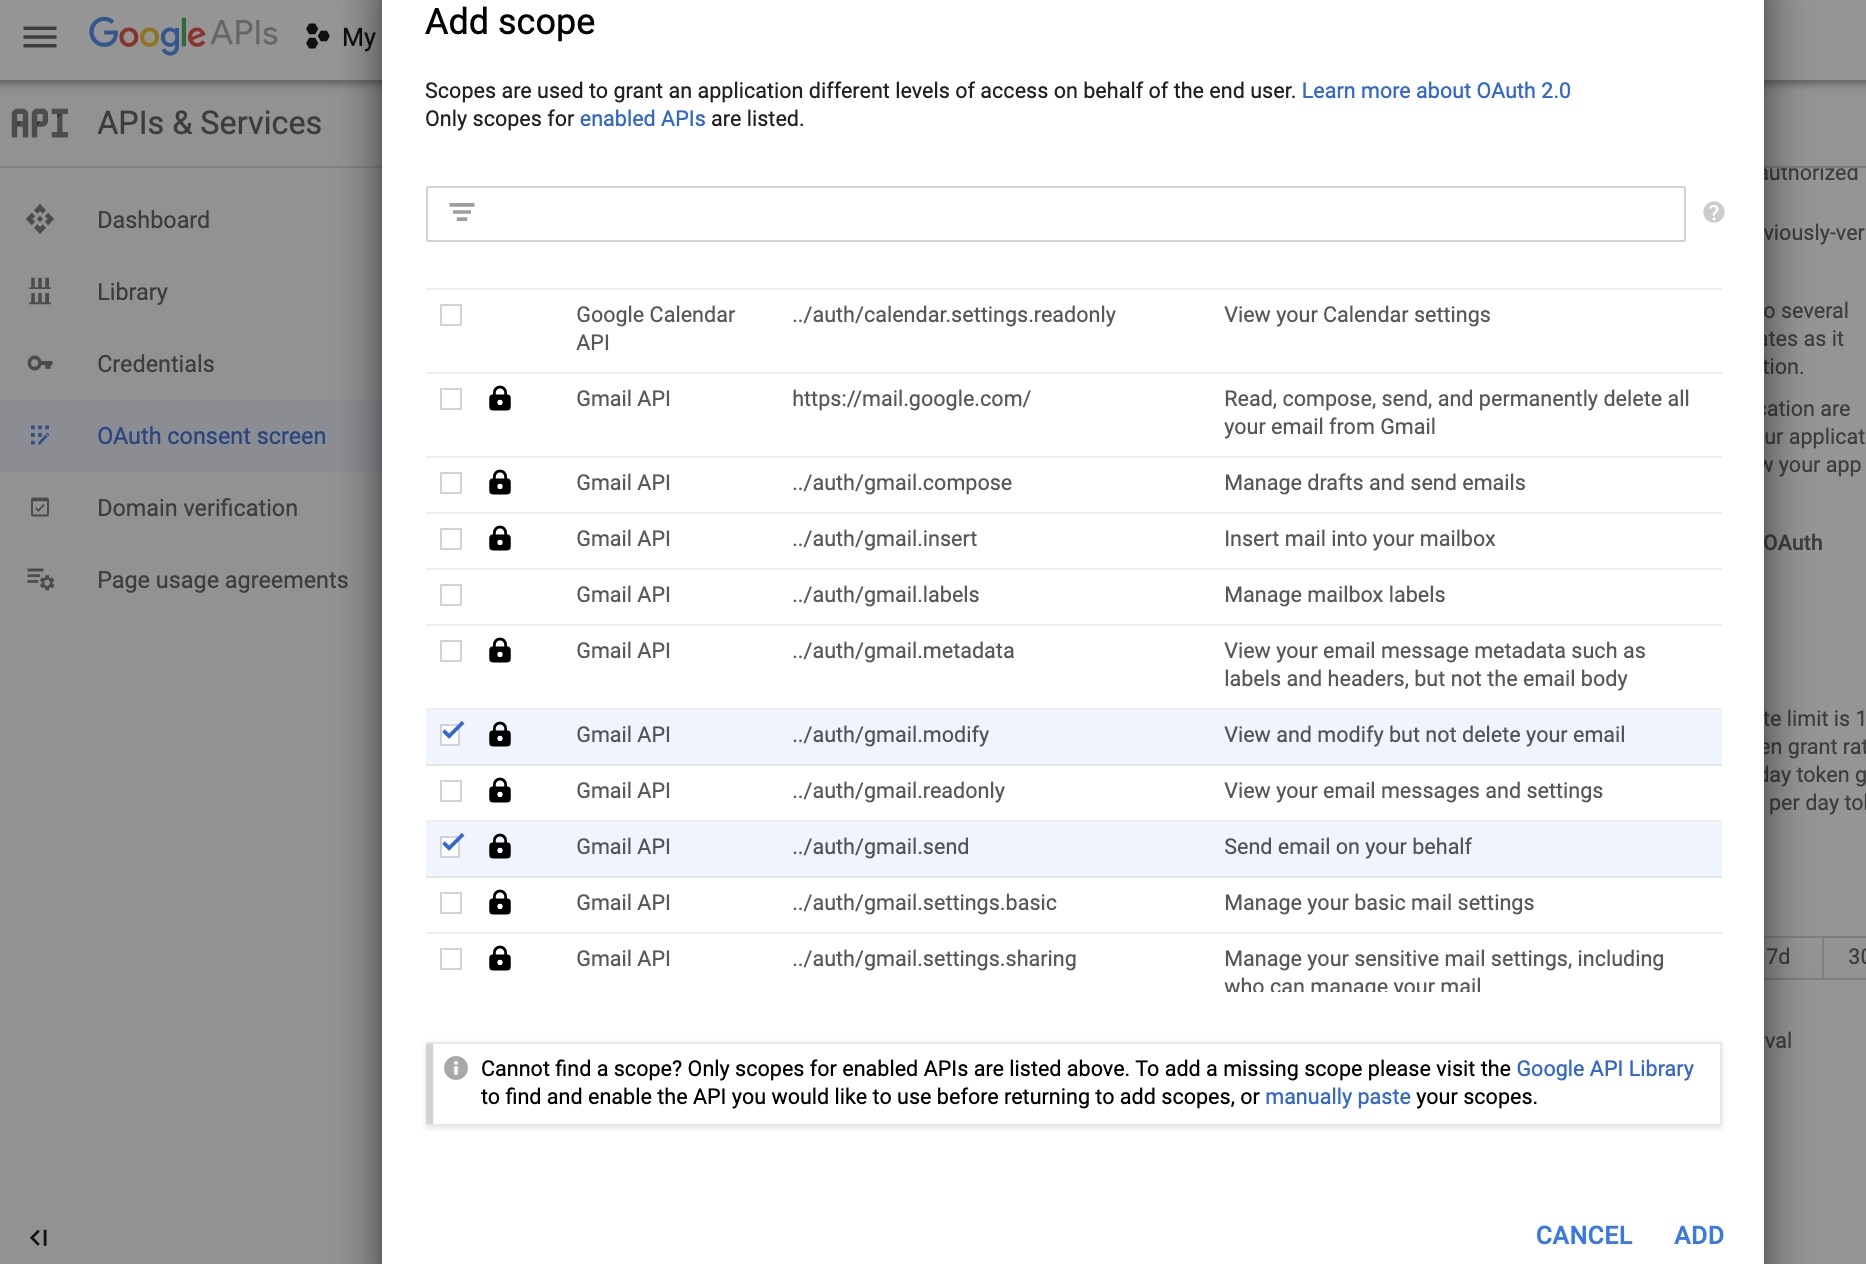
You'll need to determine what Google scopes you add to your consent screen based on your application's behavior. Please reference this mapping to see how Aurinko scopes will map to Google scopes during the authentication process:
Mail.ReadOnly
Mail.ReadWrite
Calendar.ReadOnly
Calendar.ReadWrite
Contacts.ReadOnly
Contacts.ReadWrite
Tasks.ReadOnly
Tasks.ReadWrite
Then add all required Google scopes, i.e. gmai.modify, gmail.send, calendar, contacts, tasks.
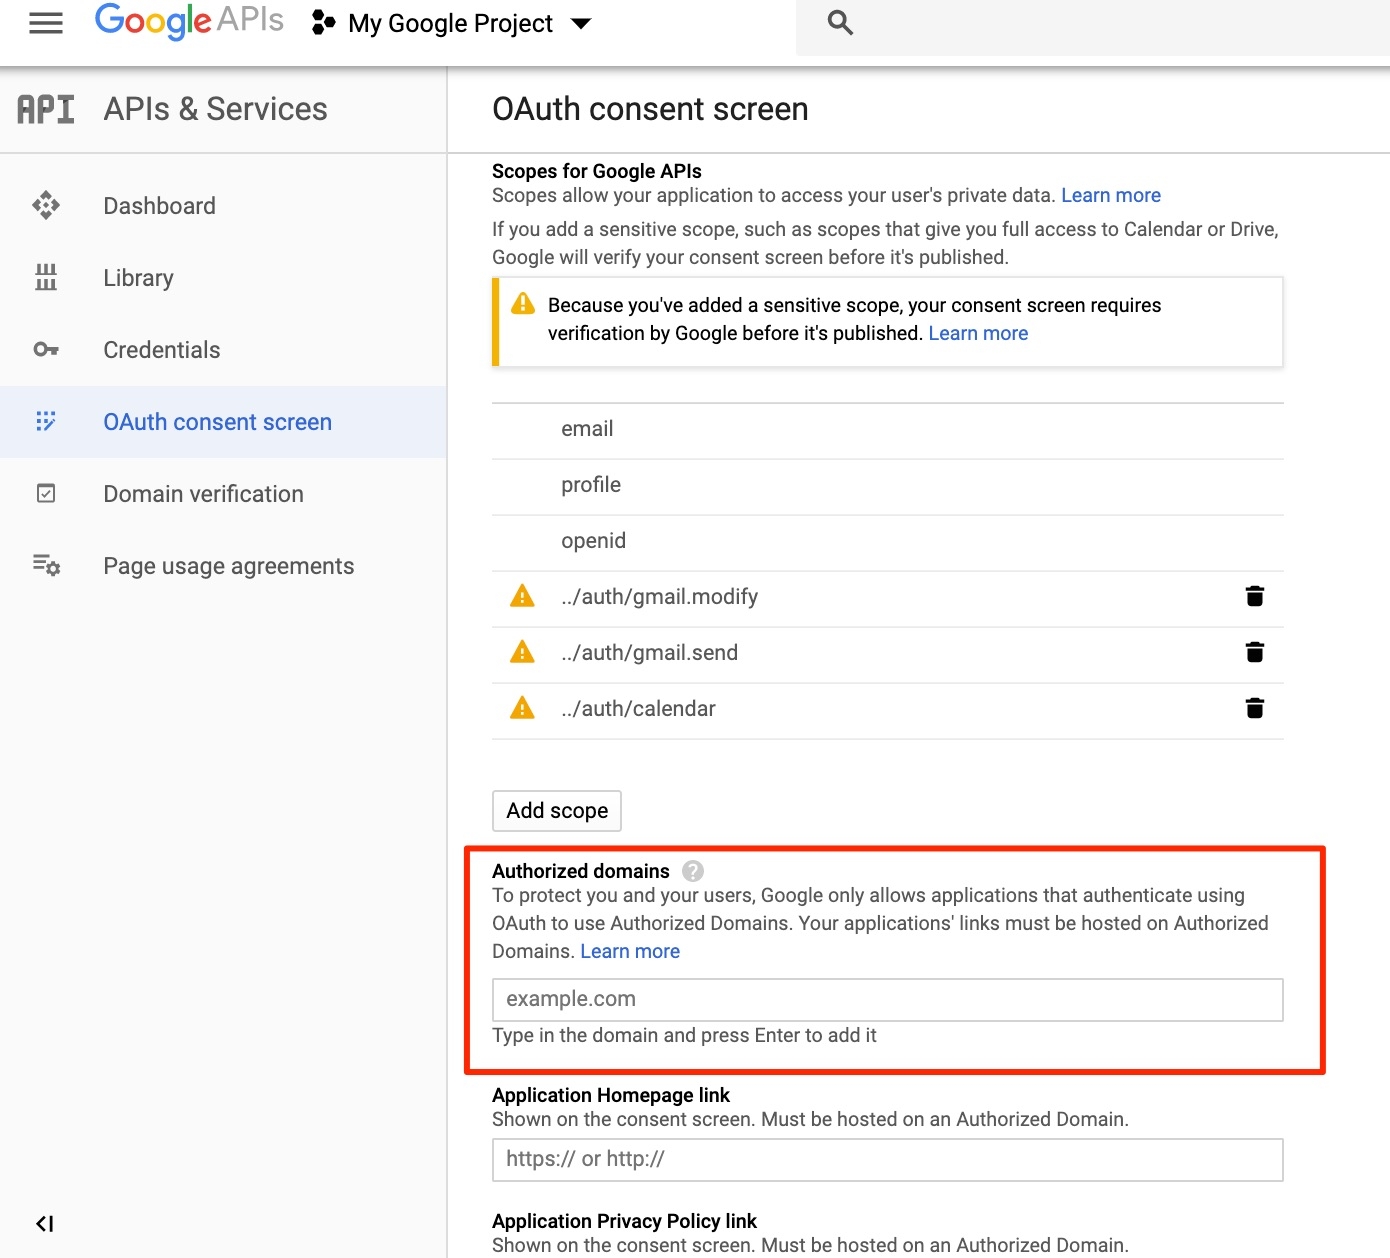
Finally, add your app's domain to the "Authorized domains" field.
Scroll down to the bottom of the page and click the blue "Save" button!
Create an OAuth credential
Click "Create credentials" and select "OAuth client ID" from the drop-down menu.
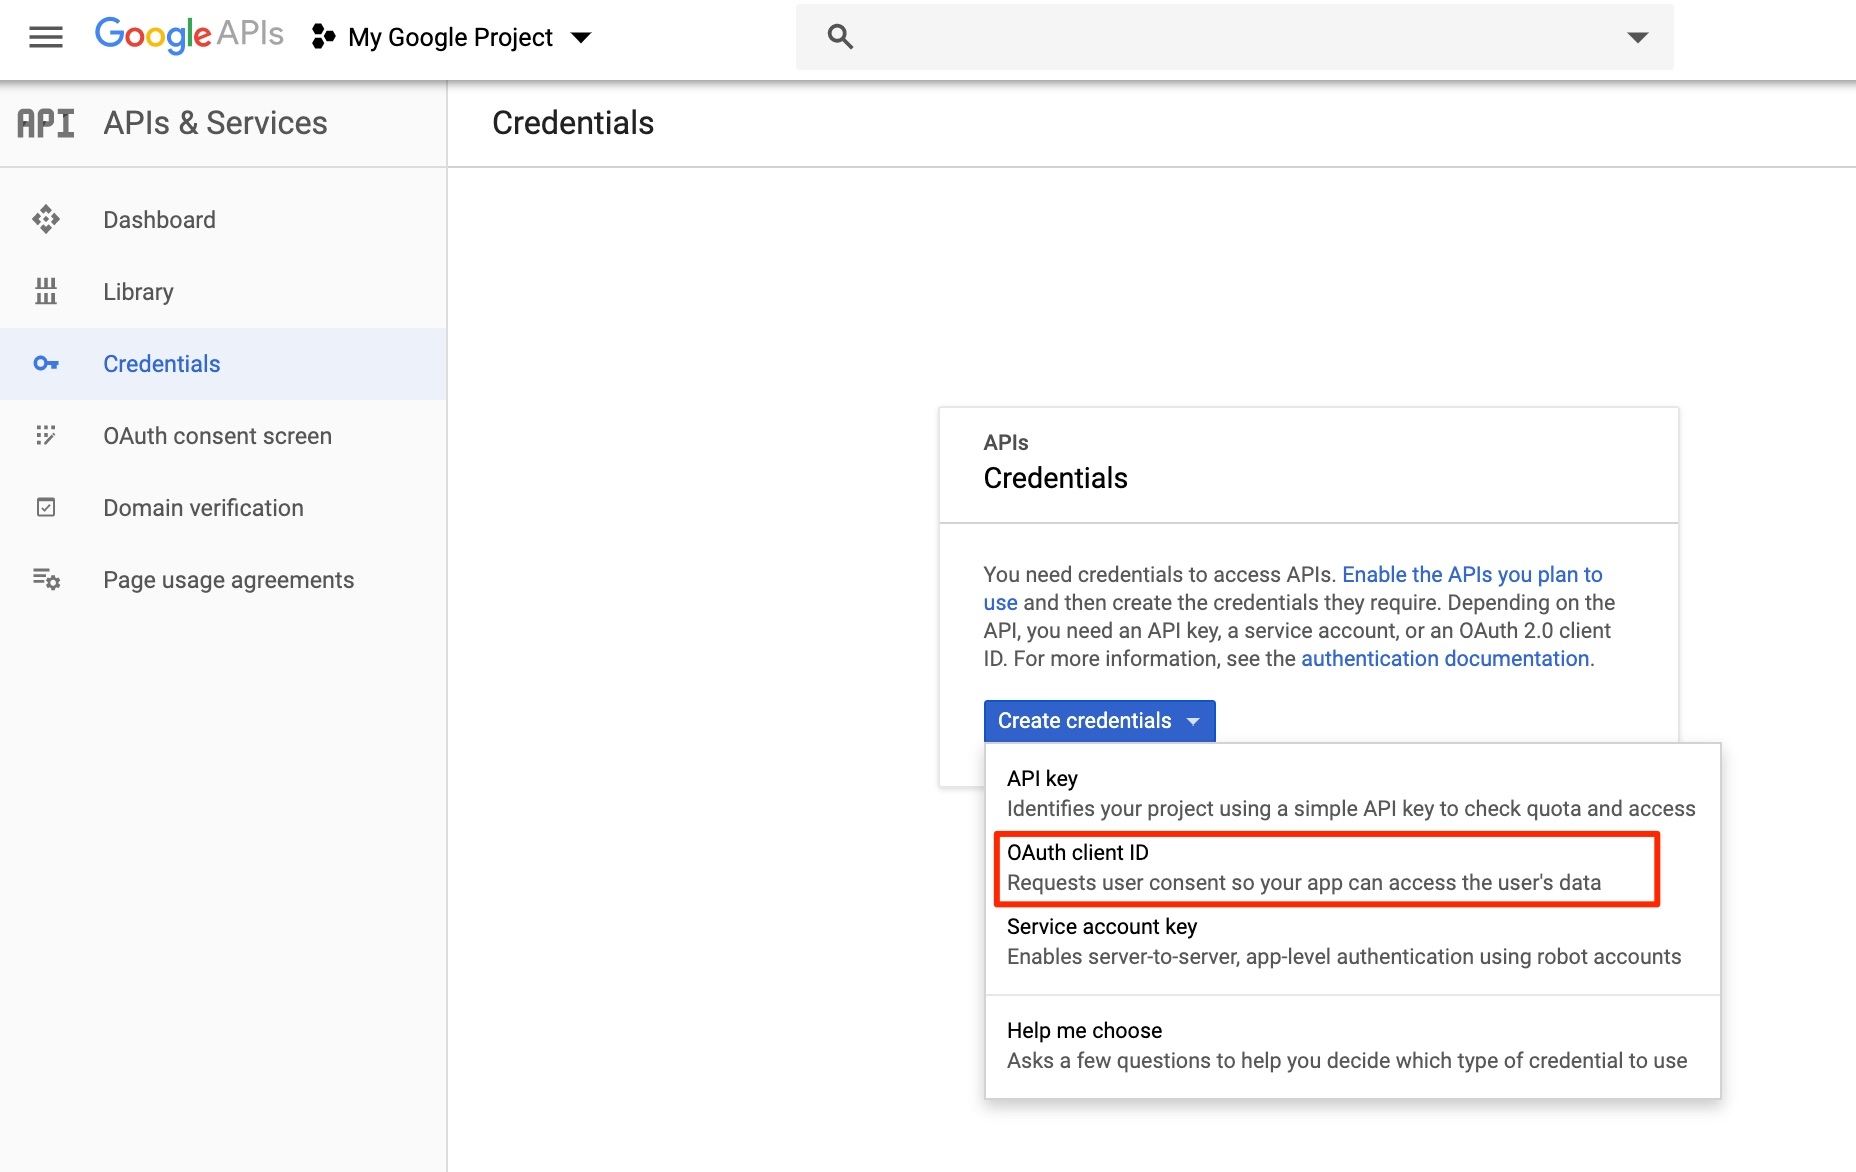
Fill out the form choosing the appropriate application type based on your application, and be sure to read the article regarding redirect URIs.
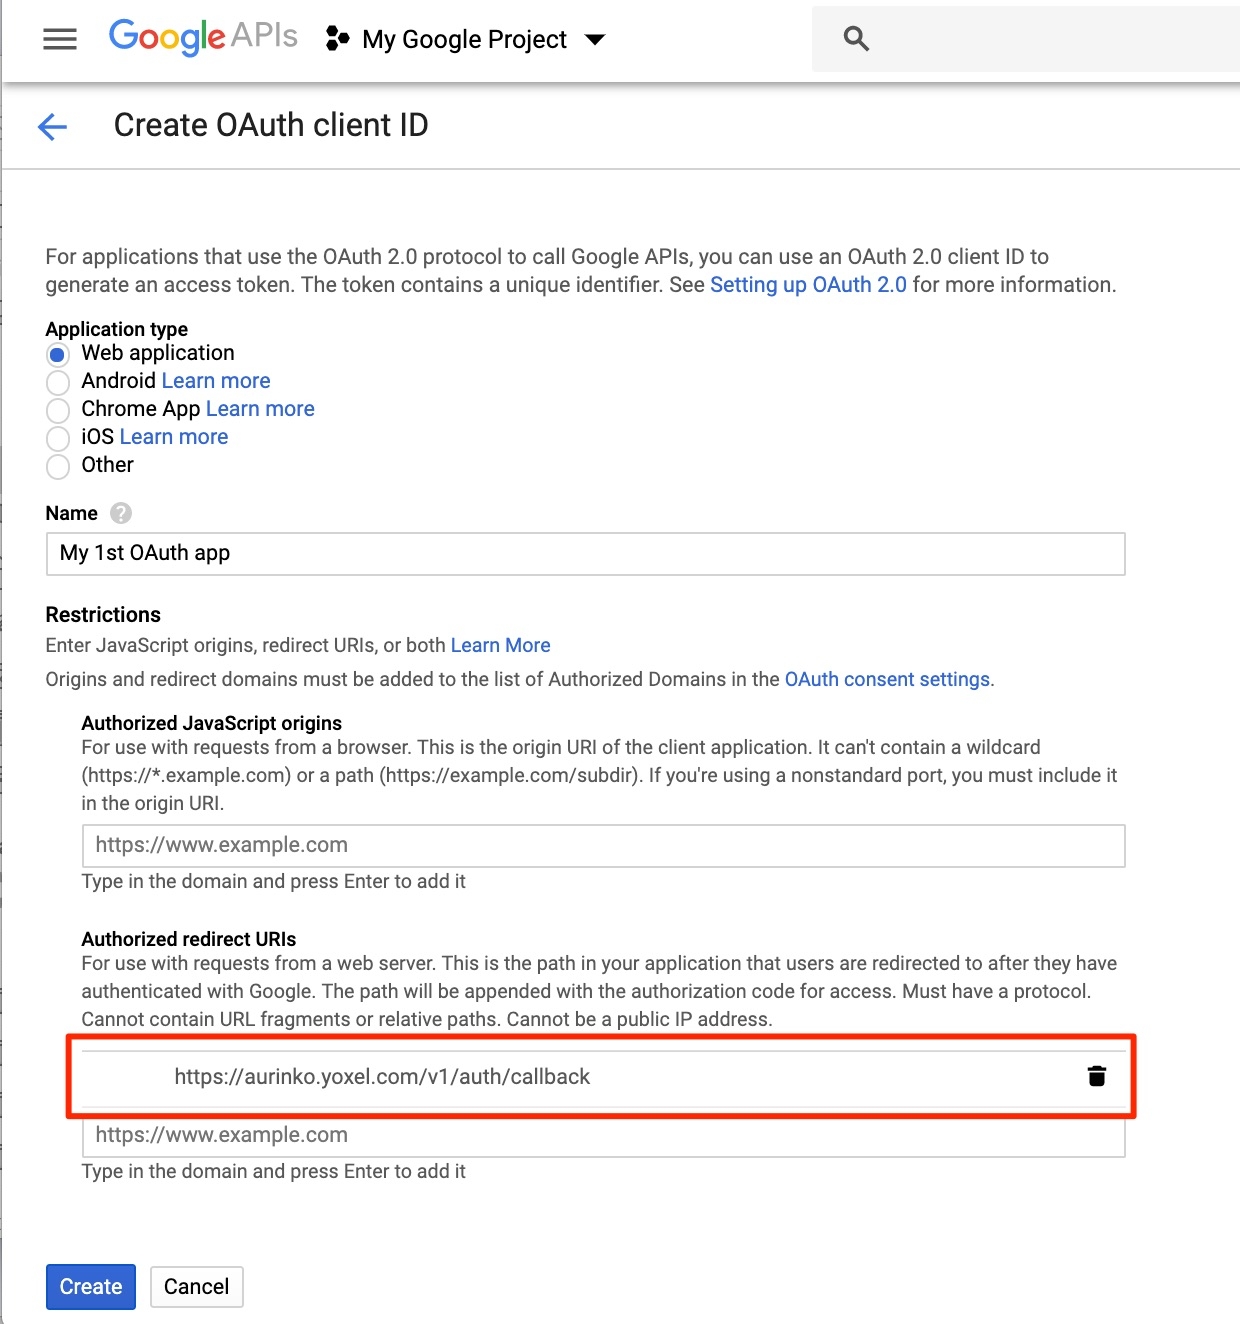
Then click the blue "Create" button at the bottom of the screen.
You'll be presented with a page that shows your new OAuth client ID and Secret. Keep the page open, as you'll need the credentials in the next step.
Configure Aurinko to use your Google OAuth credentials
Head on over to Aurinko portal and log in.
Select your app at the top, choose Settings menu and switch to the GOOGLE tab.

Copy-paste your Google OAuth client ID and Secret from the Google Developer Console and click "Save".
You are now all set to start connecting Google accounts to Aurinko!
Last updated
Was this helpful?