Office 365 OAuth setup
Set up Office 365 OAuth by registering your app in Azure Active Directory. Configure API permissions and upload your credentials to Aurinko.
In order to connect Office 365 accounts to Aurinko through OAuth2 authentication you'll need to register your app in Azure Active Directory (AAD). You will then configure Aurinko to use your AAD application Id. If you have any trouble registering your application in Azure AD, get in touch with [email protected] and we'd be happy to help you out!
Create your free Microsoft Azure account if you don't already have one. You'll use this account to create the Microsoft developer application that is used for authenticating end users via OAuth with Aurinko.
Creating an app registration
The first step is to create an app that will be used to authenticate your customers to Office365. To do that we're going to use the Azure web portal. Log into https://portal.azure.com and go to Azure Active Directory service.
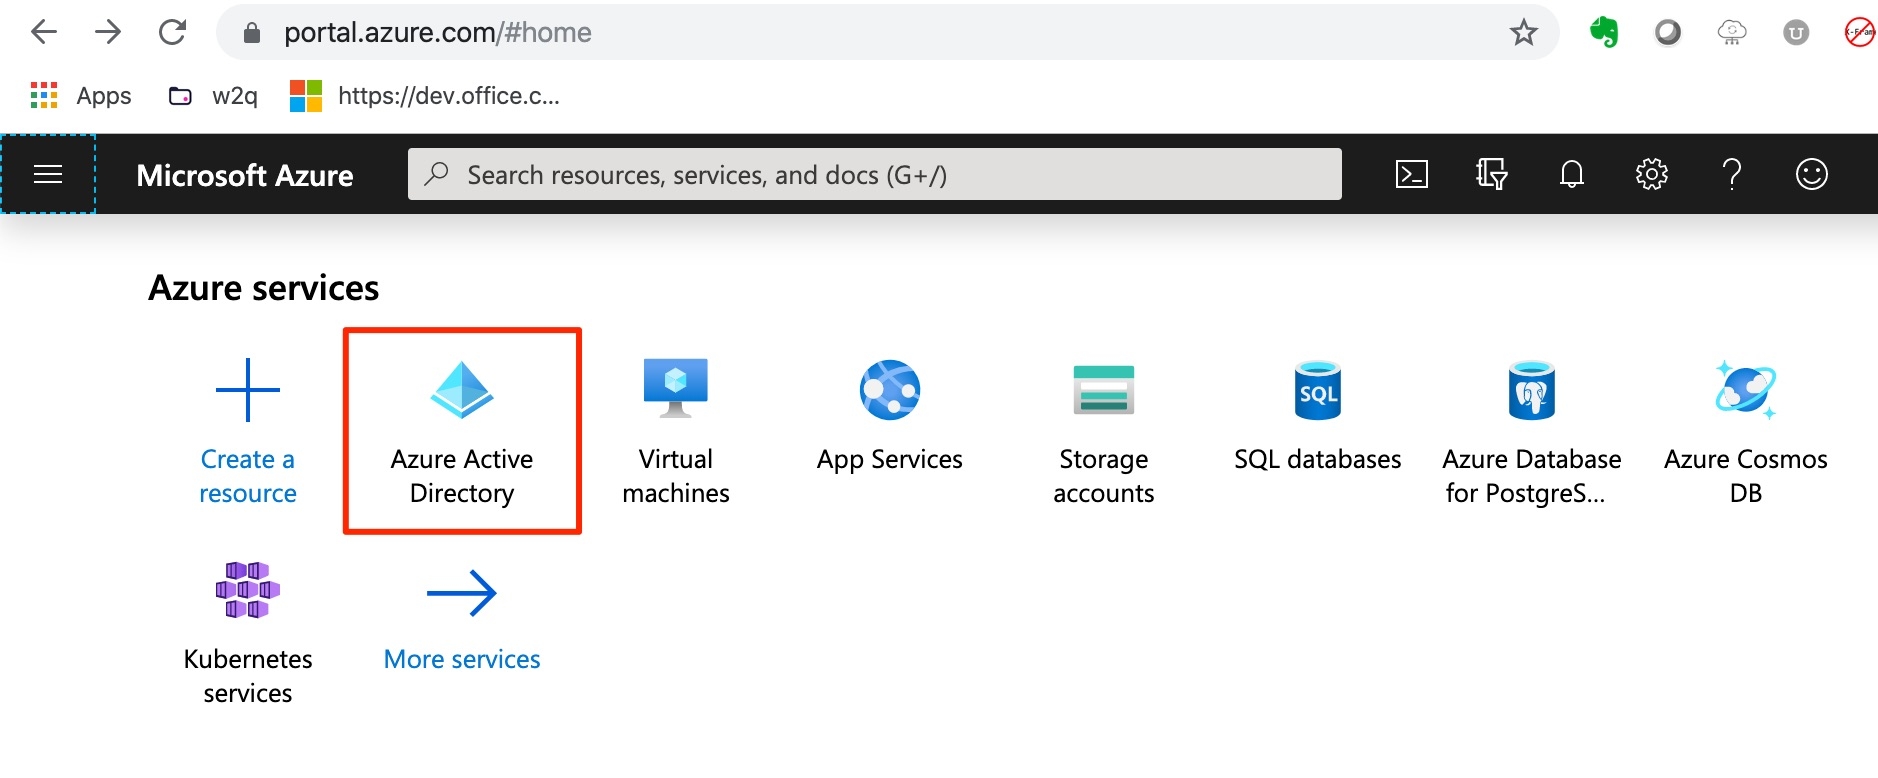
Then click "New Registration".
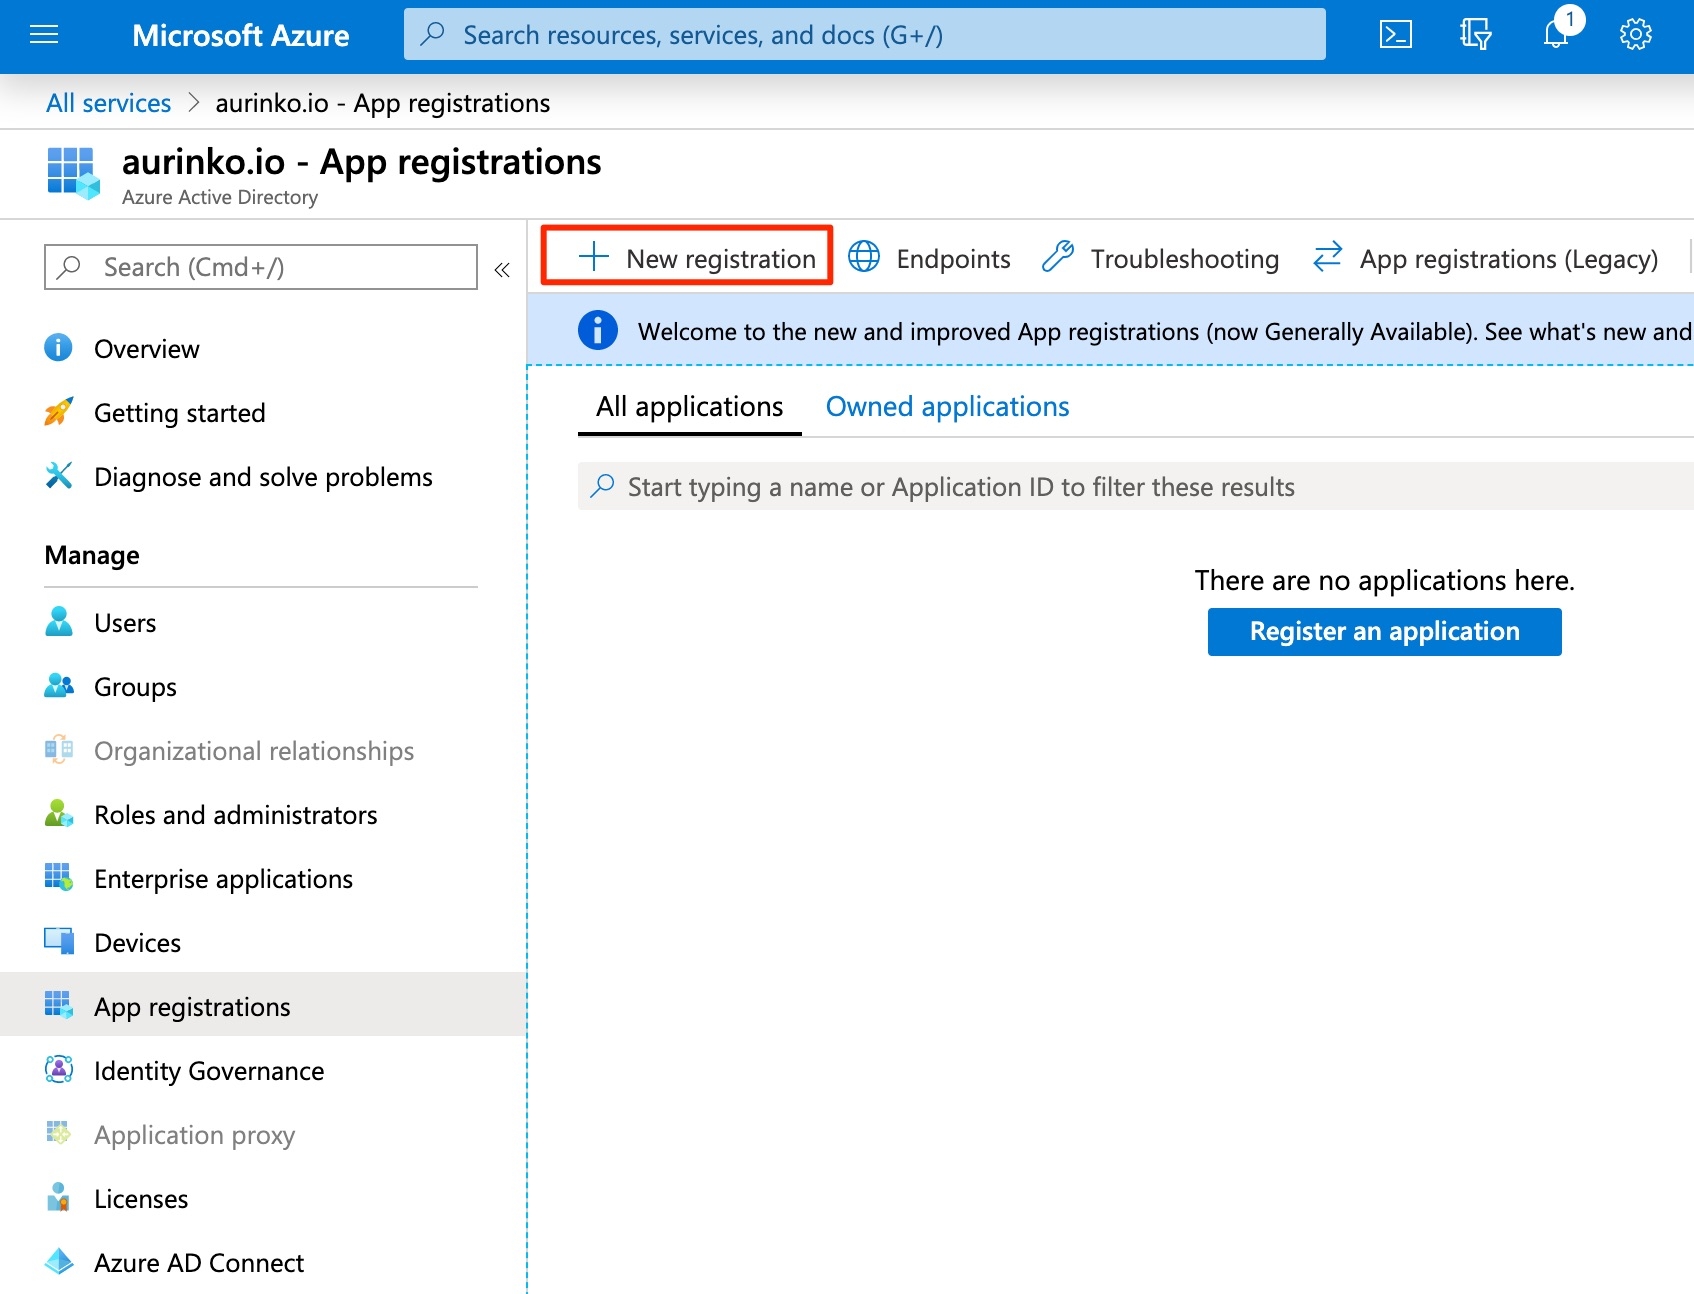
You are going to be presented with the following screen. Set your name to your app's name (this is going to be customer visible). Set the audience for this app to "Account in any organizational directory and personal Microsoft accounts" to be able to log into any Office 365 account (business and personal). You can also restrict it to internal accounts ("Accounts in this organizational directory only") if you're building an internal app. Then, specify a redirect URI, read this article for more information.
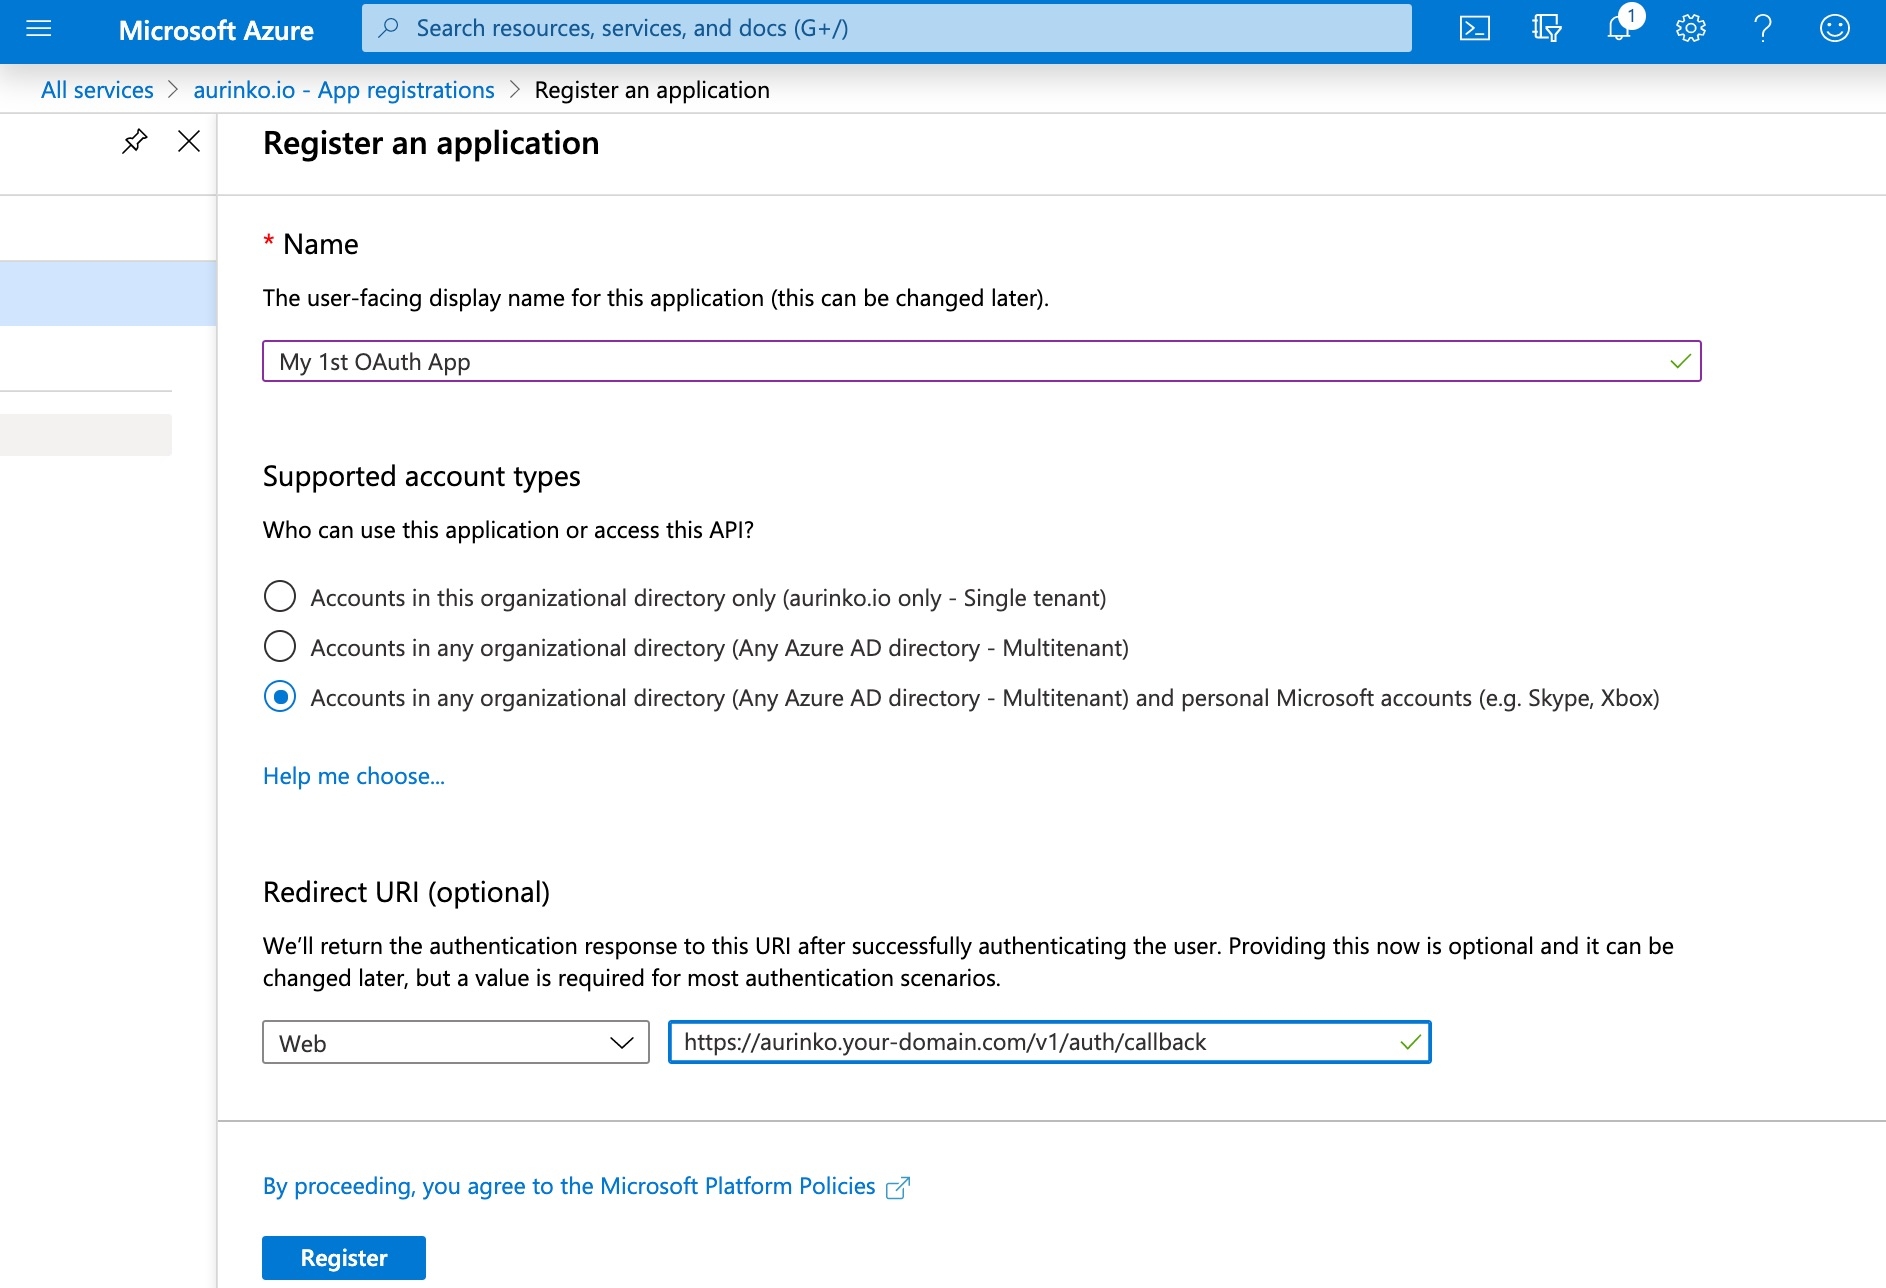
Congrats, you've just registered your app!
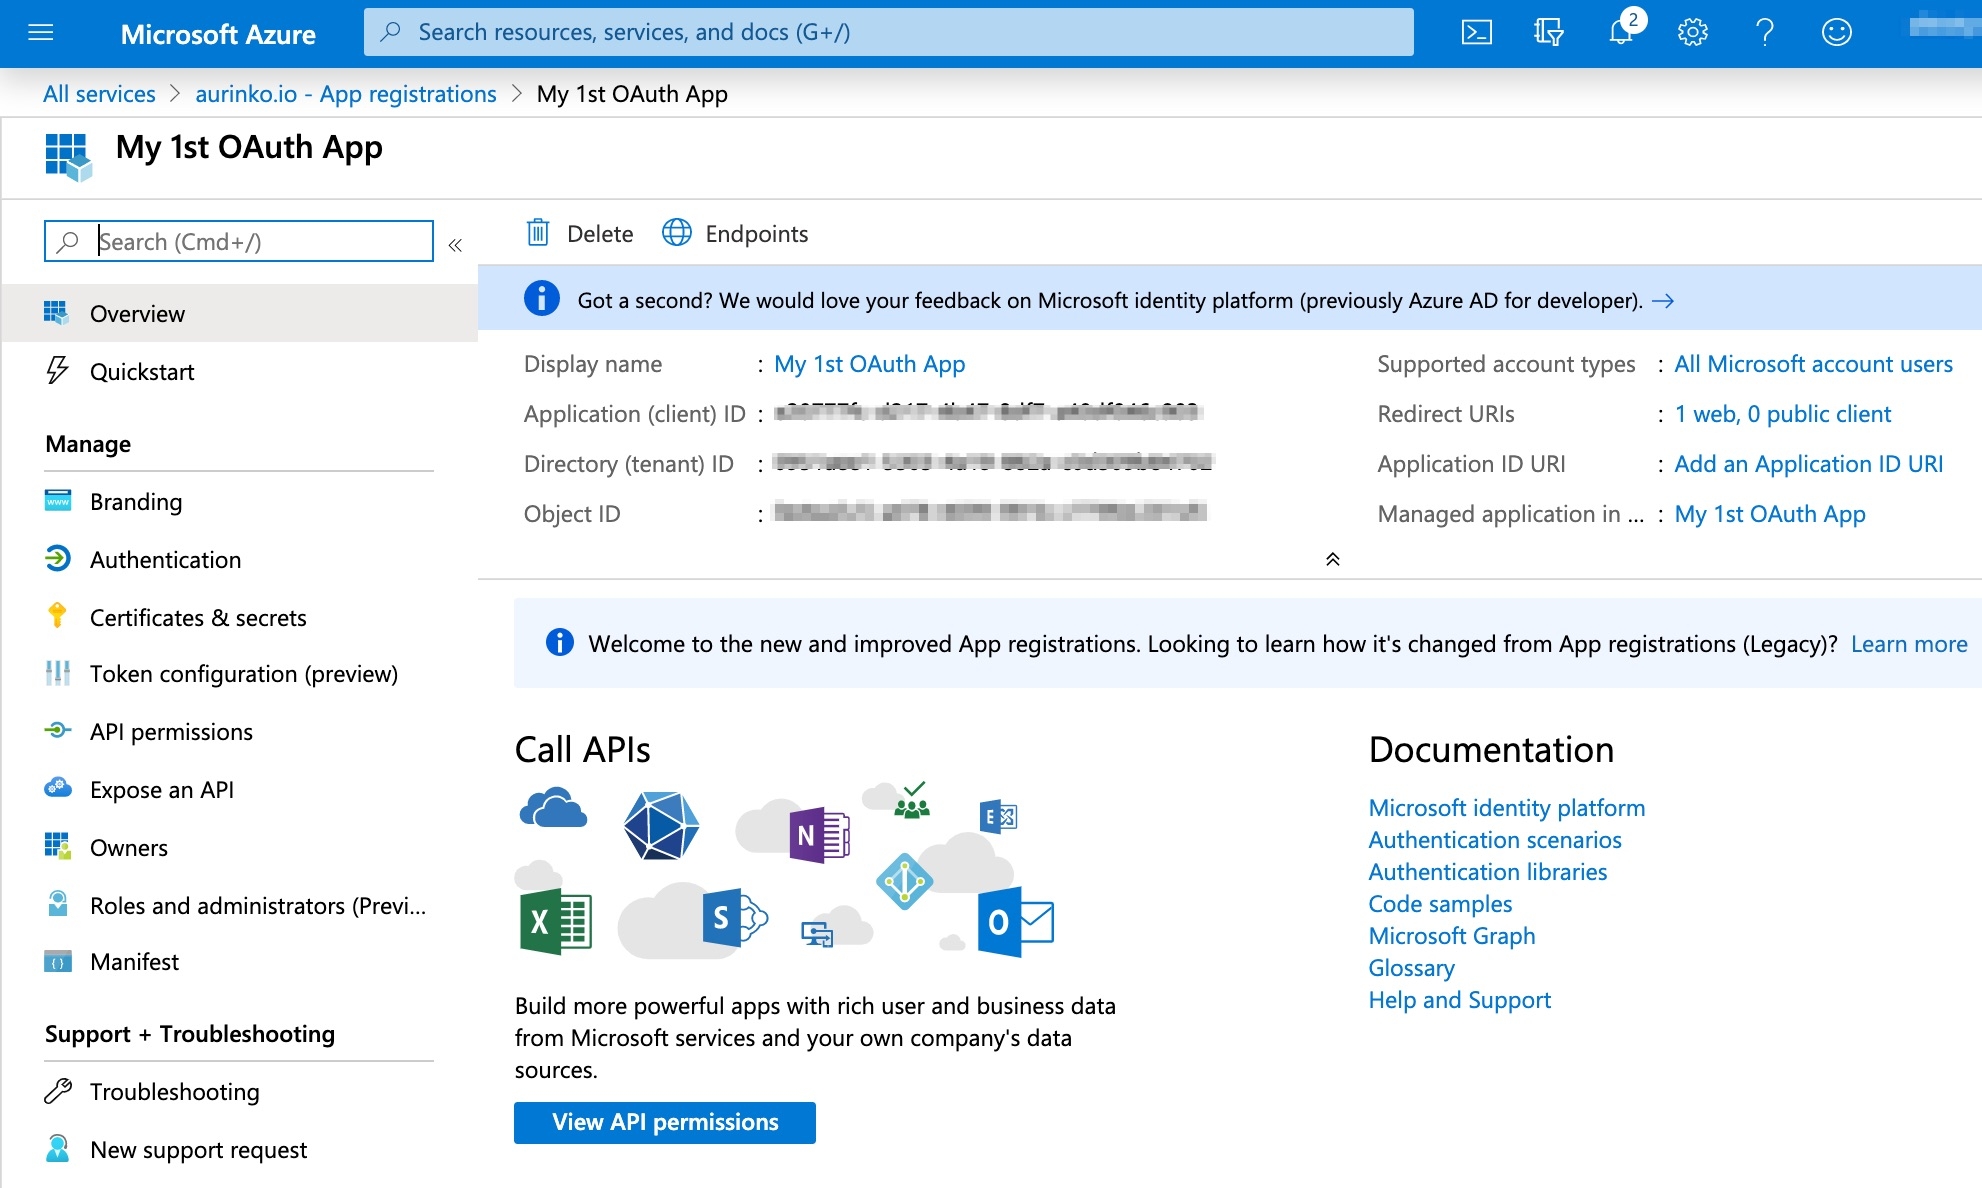
Specifying API permissions
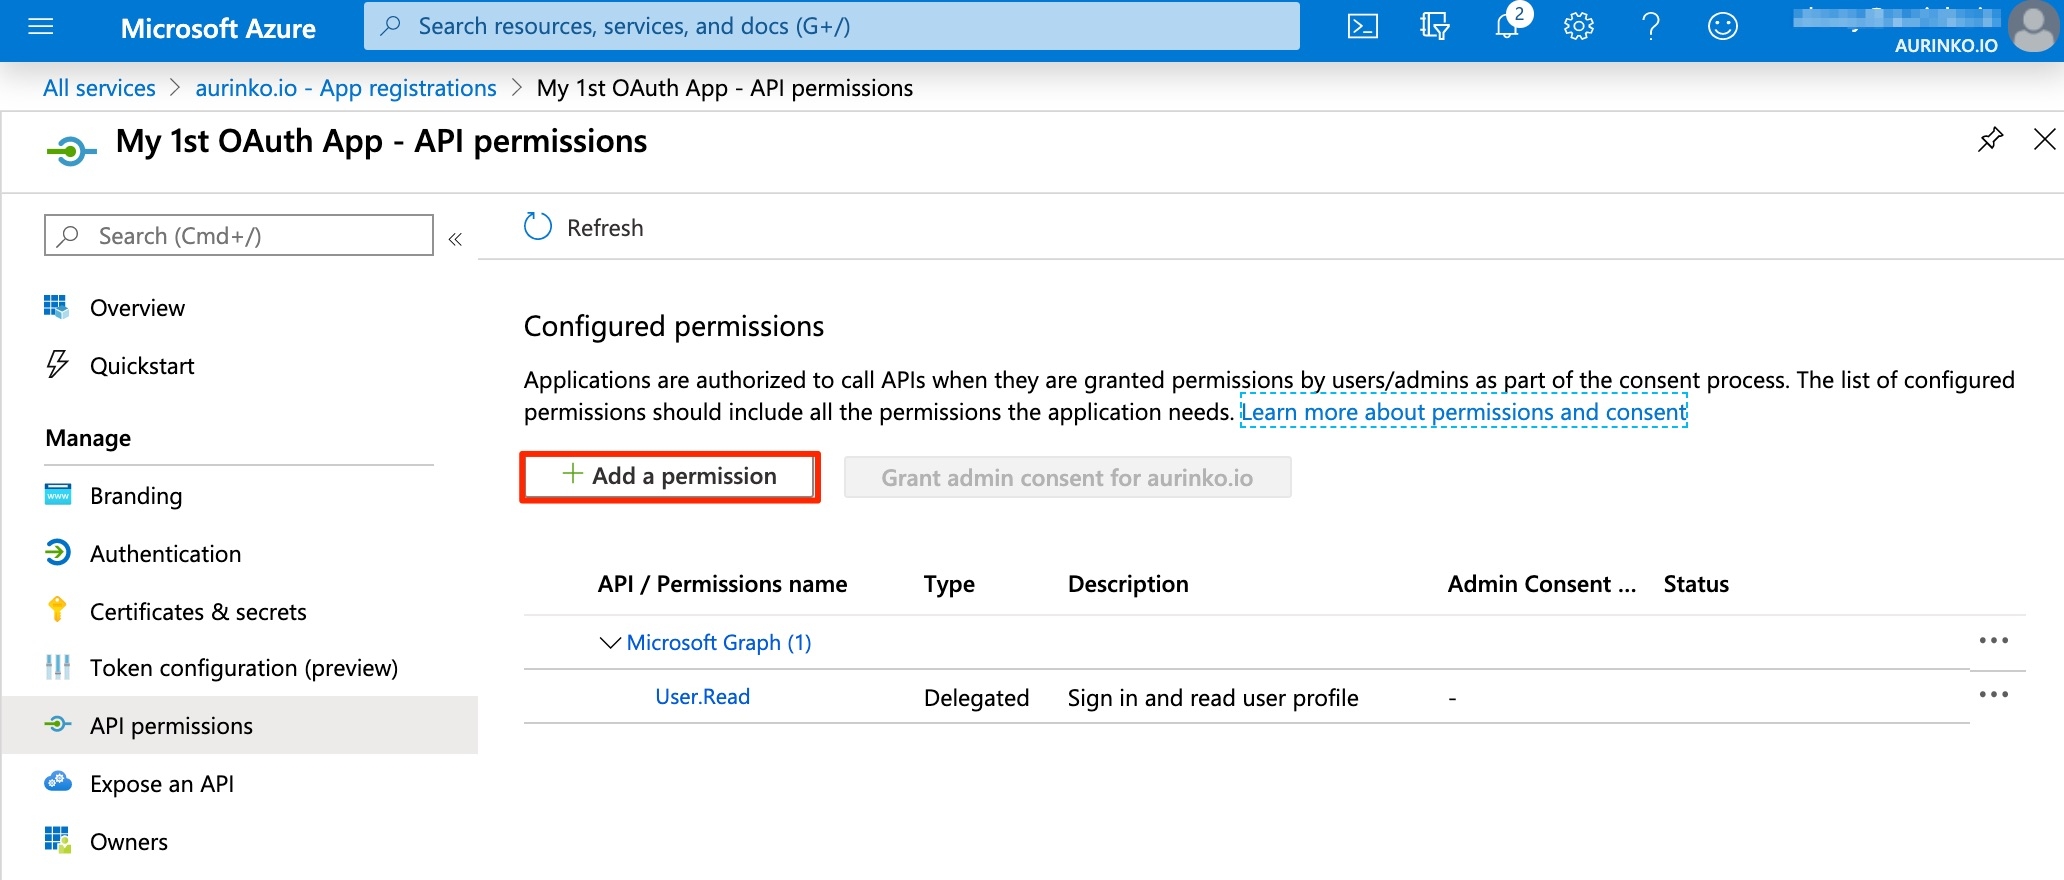
Now, let's make sure your app has the right API permissions. To do that, head to the "API permissions" panel and click "Add a permission".
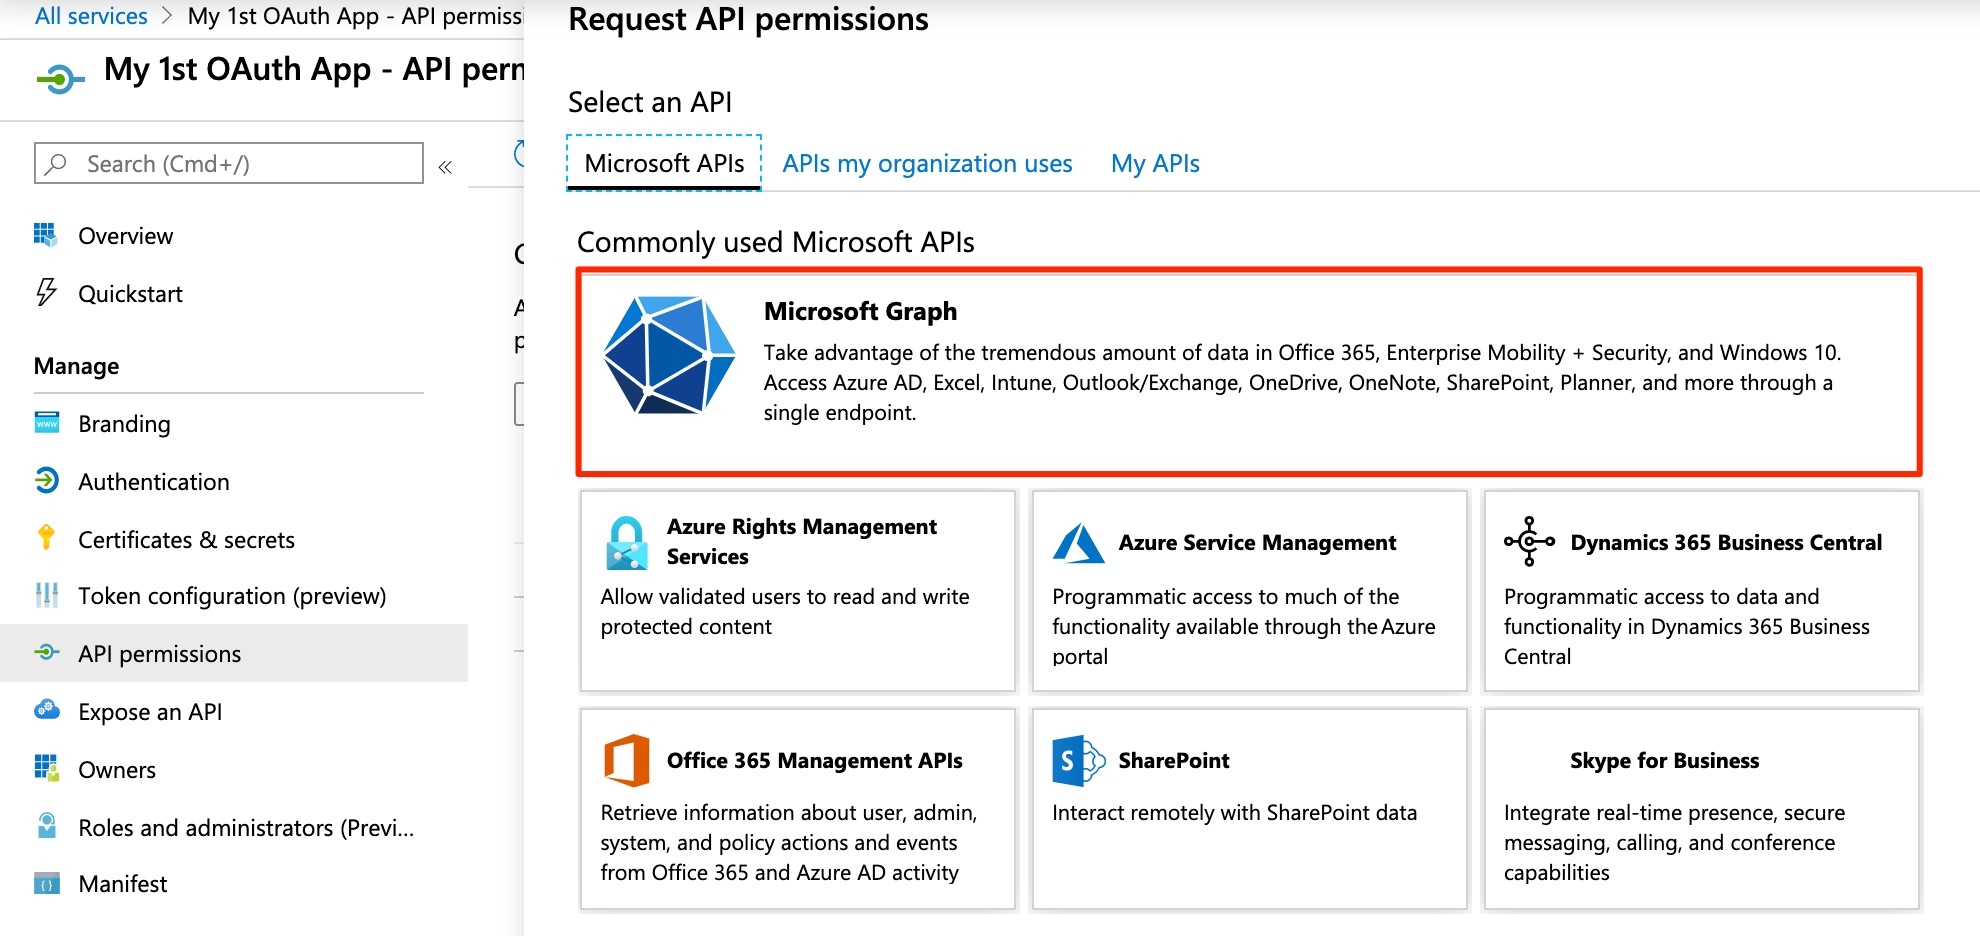
Choose Microsoft Graph set of permissions
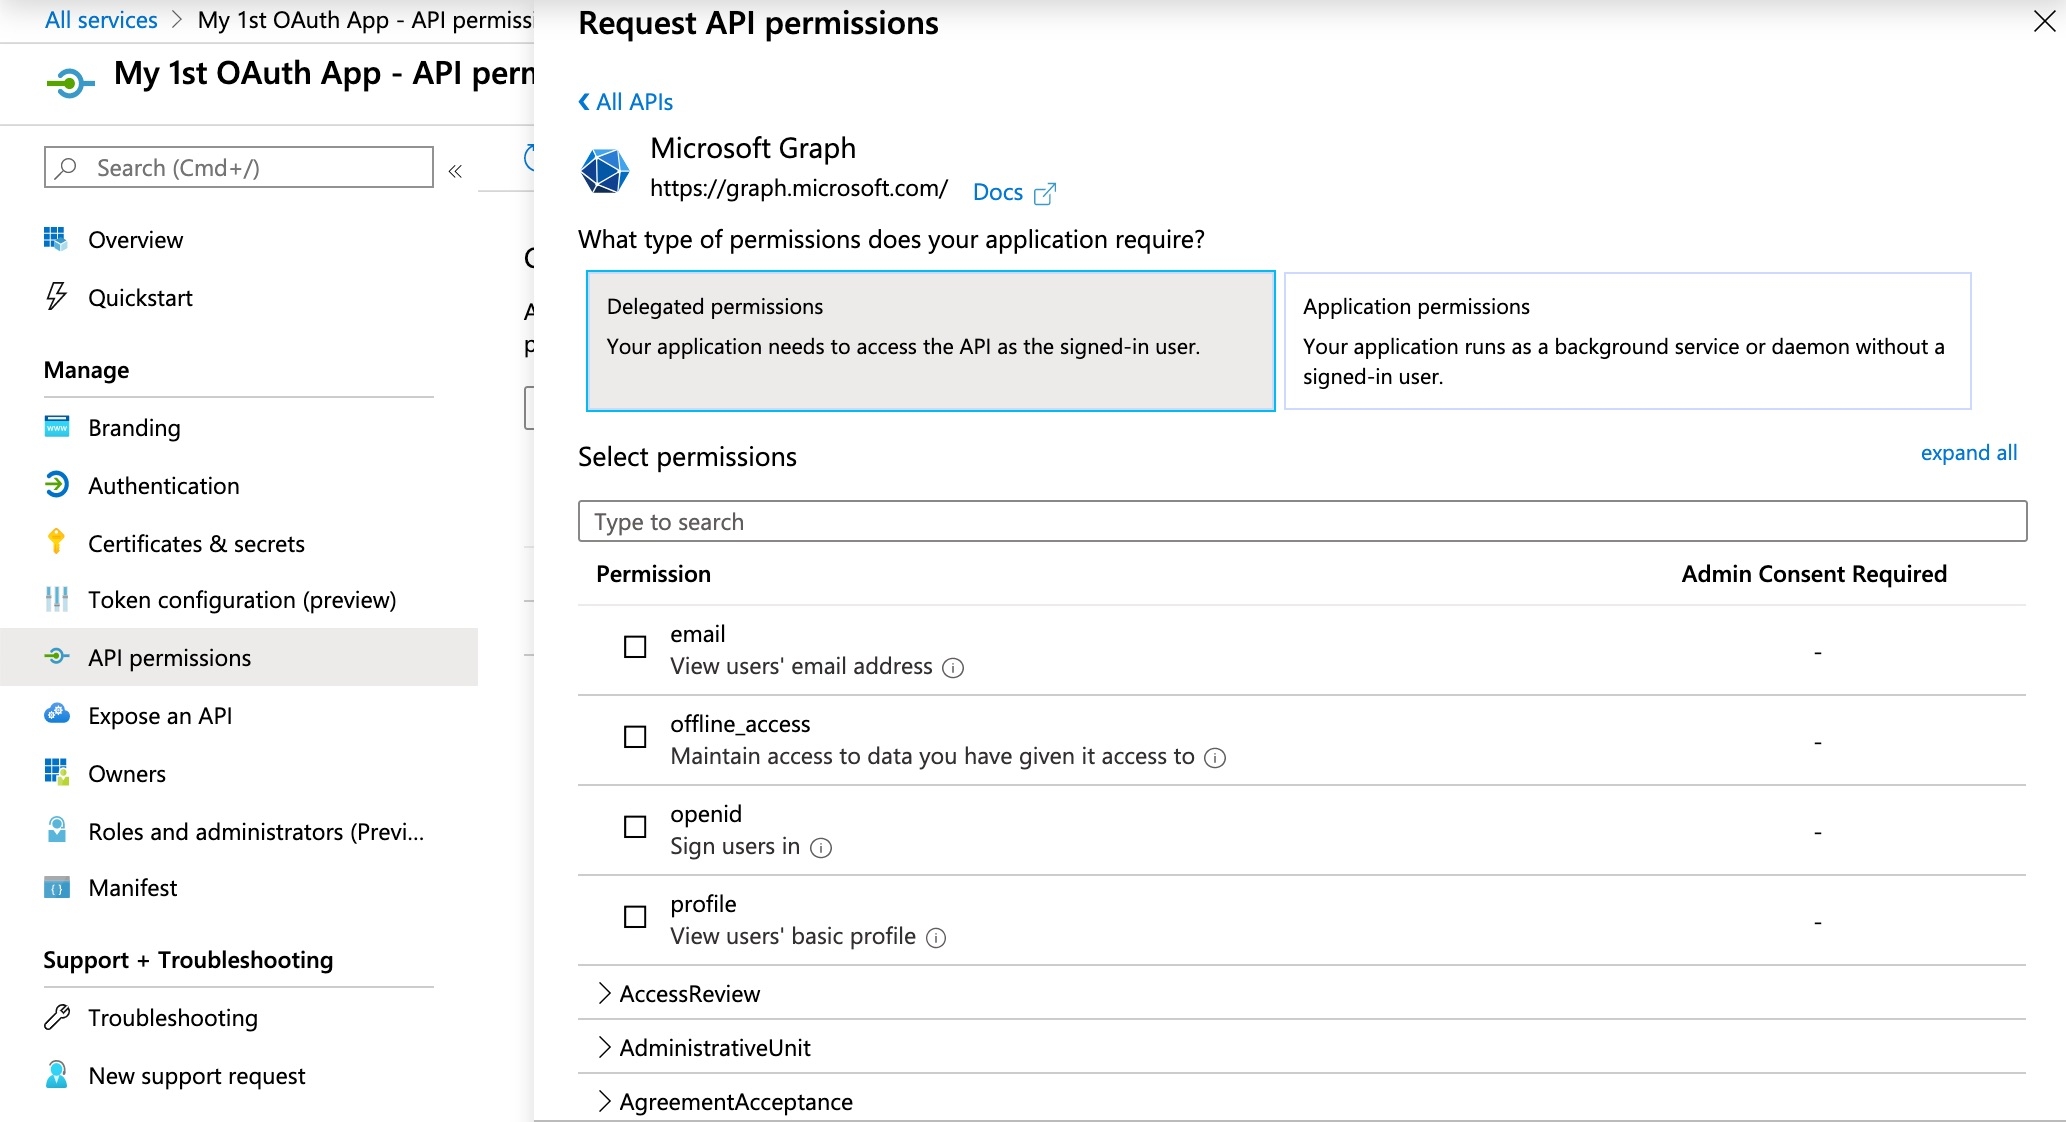
You'll need to determine what Graph API permissions you add to your consent screen based on your application's behavior. Please reference this mapping to see how Aurinko scopes will map to Graph API permissions during the authentication process:
Mail.ReadOnly
Mail.Read
Mail.ReadWrite
Mail.ReadWrite
Mail.Send
Mail.Send
Calendar.ReadOnly
Calendars.Read
Calendar.ReadWrite
Calendars.ReadWrite
Contacts.ReadOnly
Contacts.Read
Contacts.ReadWrite
Contacts.ReadWrite
Tasks.ReadOnly
Tasks.Read
Tasks.ReadWrite
Tasks.ReadWrite
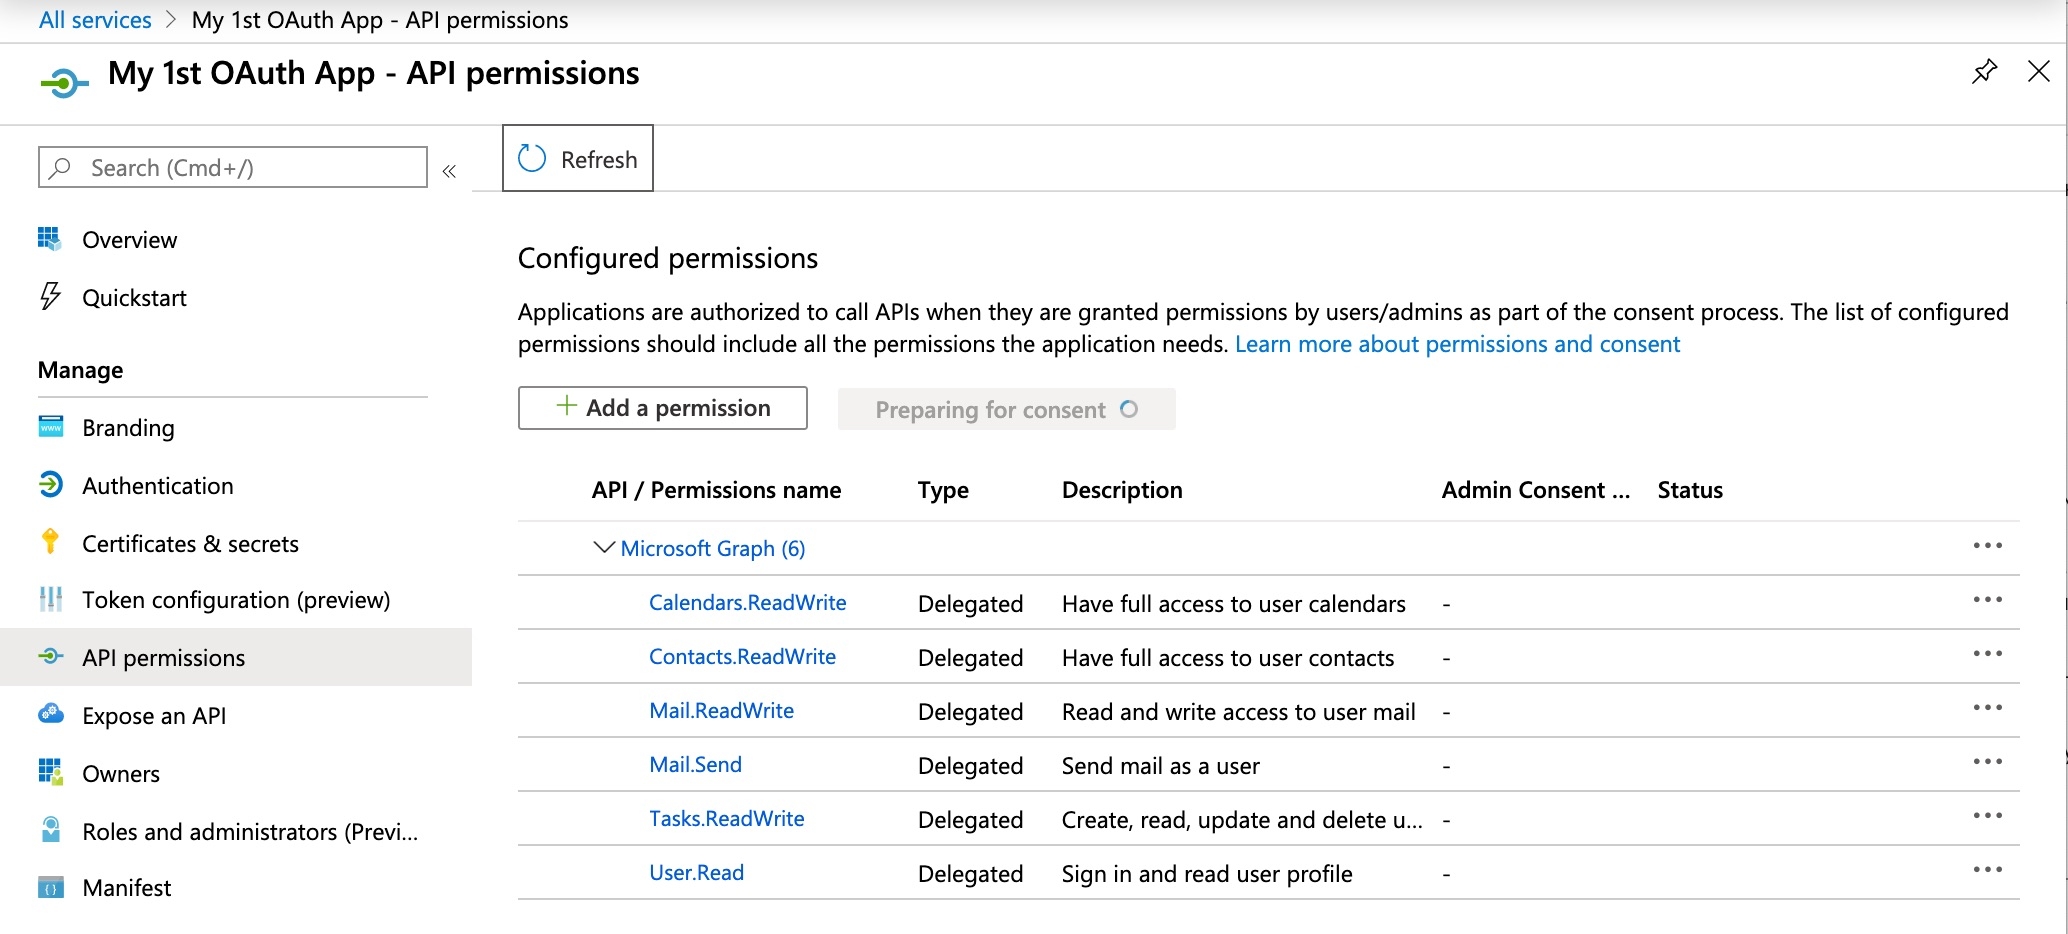
Then add all required Delegated permissions, i.e. Calendars.ReadWrite, Contacts.ReadWrite, Mail.ReadWrite, Mail.Send, Tasks.ReadWrite.
This is what your application permissions screen should look like
Creating OAuth credentials
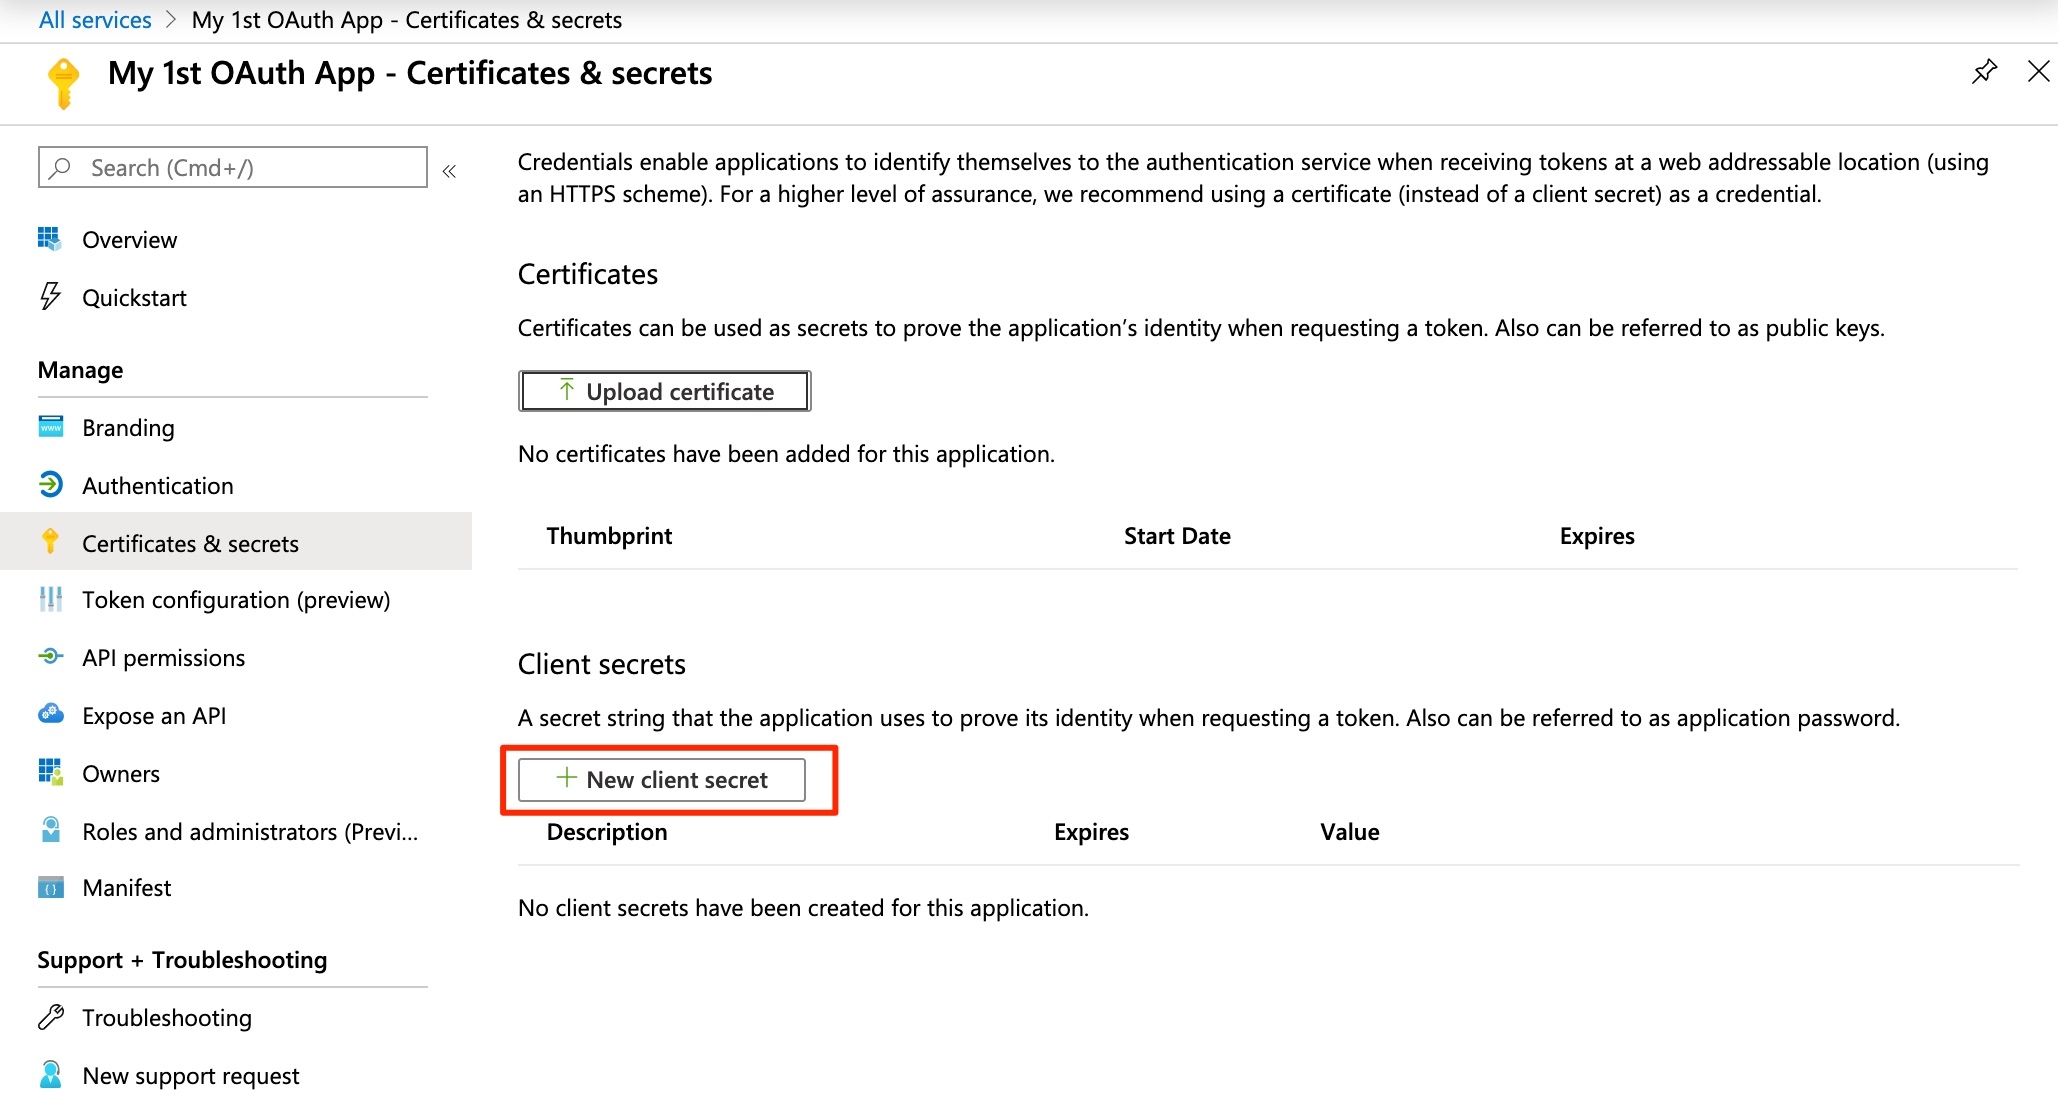
Head to the "Certificates & secrets" panel and click "New client secret".
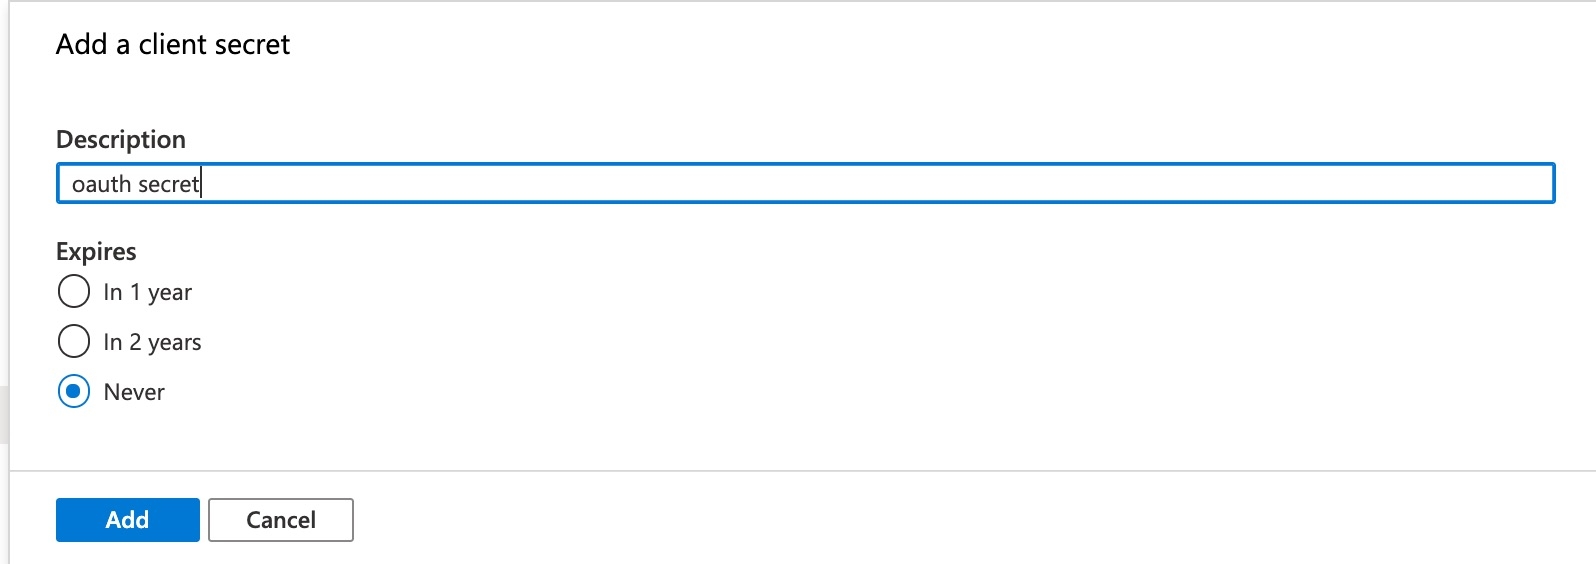
Give the secret a name and an expiration date of "never", then click "Add".
Copy the secret somewhere safe. You won't be able to retrieve it from this page afterwards!

Finally, copy the app id and secret and upload them to the Aurinko portal.
Configure Aurinko to use your Office 365 OAuth credentials
Head on over to Aurinko portal and log in.
Select your app at the top, choose Settings menu and switch to the OFFICE 365 tab.

Copy-paste your Azure AD OAuth Client ID and Secret from the Azure AD app page and click "Save".
You are now all set to start connecting Office 365 accounts to Aurinko!
Last updated
Was this helpful?